GD427 in action

Wednesday, 28 March 2012
Interior Ordered !
Ordered the interior today. There's a bit of a lead time as it's made to order but once it arrives I'll have all the parts I need to finish the build. Exciting times !
Fog & Reverse Lights
Made a start on fitting the rear fog and reverse lights.
GD supply the mounting bracket which is basically a short length of stainless tube with a plate welded on the end for the light to mount onto. The other end has been profiled to fit the body shape in this area. It took me a little bit of trial and error to get them positioned both centrally and level but I think I'm about there. Next step is to drill some holes and modify the lights themselves by replacing the standard fixing bolts which come affixed to the light with some longer bolts which pass through the light fitting, through the mounting and through the body holding it all together by sandwiching the mounting between light and bodywork.

GD supply the mounting bracket which is basically a short length of stainless tube with a plate welded on the end for the light to mount onto. The other end has been profiled to fit the body shape in this area. It took me a little bit of trial and error to get them positioned both centrally and level but I think I'm about there. Next step is to drill some holes and modify the lights themselves by replacing the standard fixing bolts which come affixed to the light with some longer bolts which pass through the light fitting, through the mounting and through the body holding it all together by sandwiching the mounting between light and bodywork.

Saturday, 24 March 2012
Roll Bar Rubbers
I'd recently taken the roll bars off in order to polish the rear deck so when I put them back I took the opportunity to fit some rubber "doughnuts" to seal the gap between the roll bars and where they pass through the boot floor before being bolted to the chassis.

That's the last update for today although just before coming in from the garage I re-fitted the windscreen so I might post some more pictures tomorrow. I feel like I'm at a bit of a turning point in this build, I've taken my time, thought things through and really enjoyed what I've done but I'm also getting a bit restless and want to see this thing on the road. I'm finding that I'm pushing on without getting too hung up on the fine detail which because I can be a picky bugger just seems add hours, weeks and months to the build. Hopefully some more action tomorrow but having spent most of today "playing" I've got a few brownie points to earn with "err indoors".
Watch this space !
Handbrake
The handbrake lever has been fitted before but now I've connected it up to the handbrake cable. I had to do a little fettling to get this to fit. Firstly the clearance between the bolt heads which hold the bracket to the side of the car interfered with the bolts which hold the handbrake to the bracket so I had to re-drill one in a different location. Secondly the handbrake as supplied is designed to use a different fitting to the cable so I had to drill out the locating pin in the handbrake lever and replace it with a bolt which passes through the end of the fitting supplied on the cable. The lever itself is a little close to the side of the cockpit so I might have to bend away a little to give more clearance. The bolts which pass through the floor go through a steel plate I've made which bolts up against the underside to spread the load. Forgot to take a picture so I might add one at a later date.


Exhaust Clamps
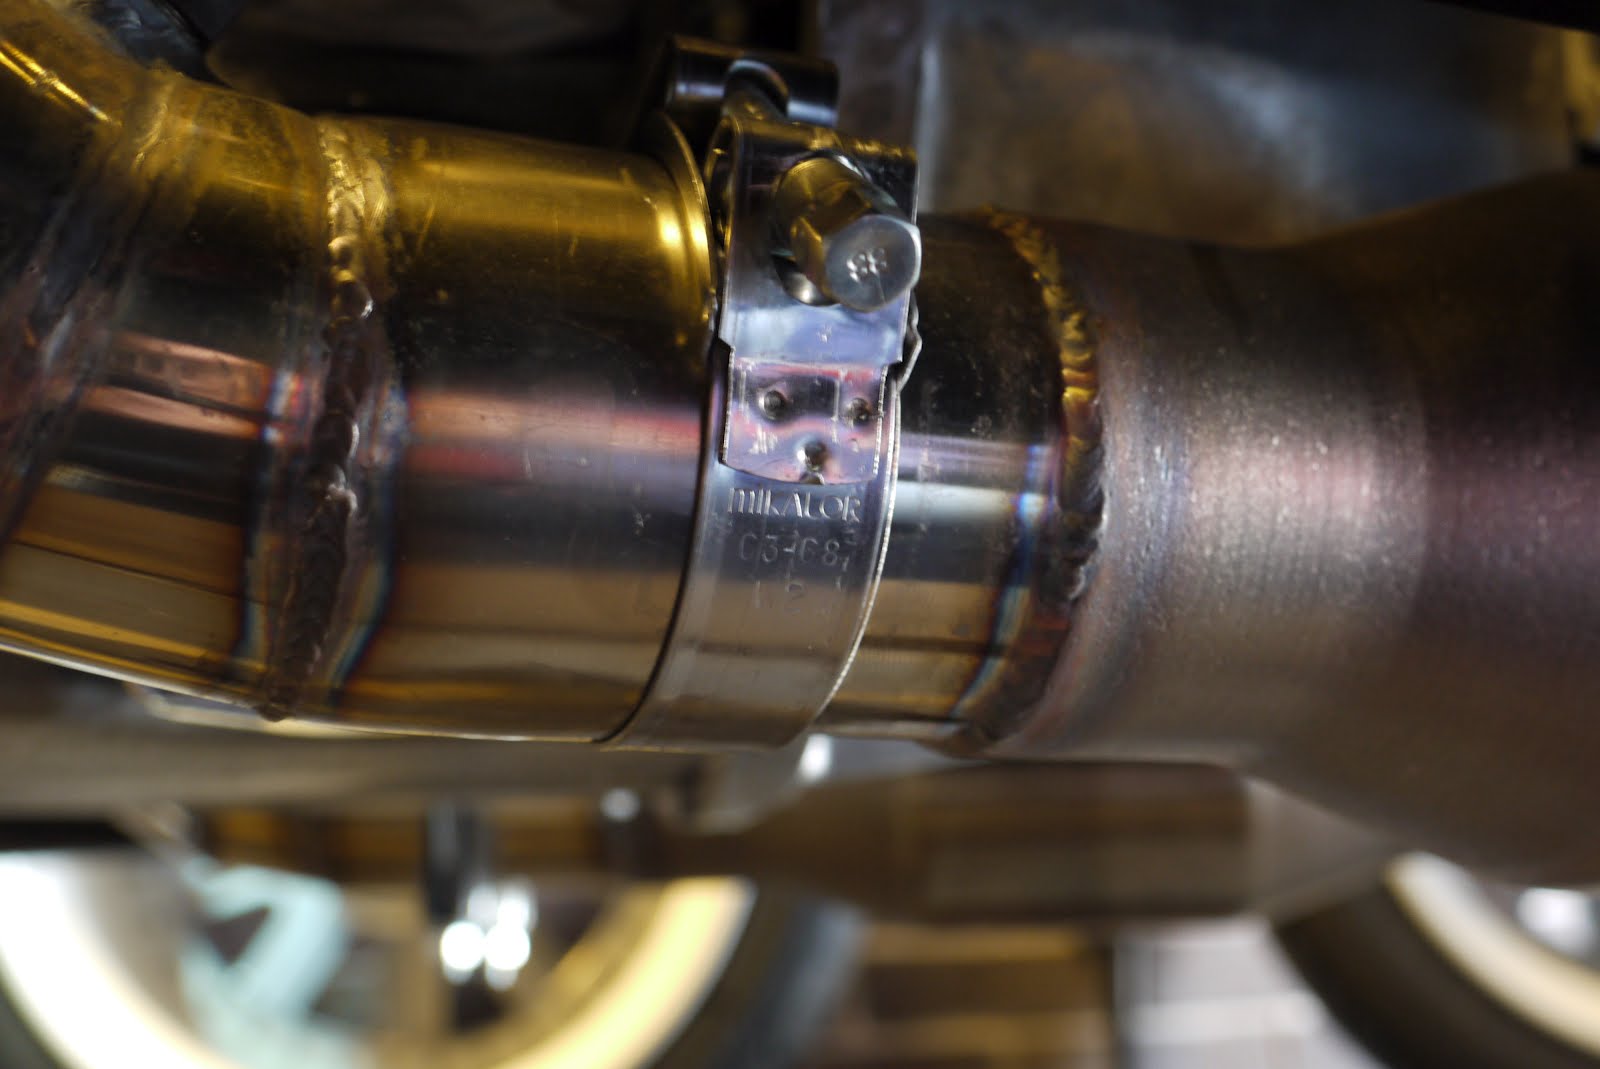
Couldn't resist a bit of bling !
The standard exhaust clamps supplied are the usual U bolts. I've seen some stainless steel ones on the net which got me interested and then I saw that Rob had fitted them to his build and as well as looking a lot better they seem to be more practical and give a little more ground clearance. They were very easy to fit and give a more nicer finish to the exhaust system. Cost about £10 for 4.
Before

After

Low Oil Warning Light !
Weren't too sure what to do with this. The LS3, being a modern engine, has provision for a low oil level light built into the sump. The sender also provides a signal for a hot oil warning light. I hadn't intended to do anything with these but I also wanted to protect the sender in case I wanted it in the future. In the end, whilst trying to work out what the plug the hole with to protect the contacts I thought I might as well get the proper connector and wire it up. I'm still not sure exactly how I'm going to use the output, I thought I might simply wire a buzzer instead of a light for the low oil level which would be heard when you switch the ignition on. I guess in reality, with the amount of miles I'll be doing and the frequency of use, low oil won't ever be a problem, it's not like it's a big deal to use the dipstick anyway.


Steering Column
Fitted the steering column today. Used a similar idea to how I sealed the engine loom as it passes through the bulkhead and used a stainless steel ring which sandwiches a rubber gasket against the bulkhead which the column passes through. My thanks to Steve from the Cobra Club for his handy work making/cutting out the stainless for me.


Monday, 12 March 2012
Exhaust
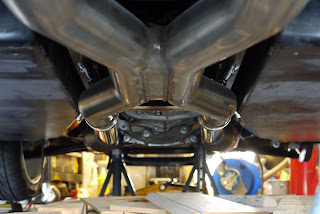
Spent some time over the weekend doing a little compounding and polishing on the rear deck and boot lid and fitting the rear cherry bombs to the exhaust. The polishing was in preparation for fitting the roll bars for the last time. After all the experimenting I've done with different compounds, polishes and pads my final weapons of choice are:
I'm getting pretty confident with the polishing now so will probably press ahead and get it looking respectable and on the road and worry about some of the fine detail later otherwise I could spend forever getting it all perfect. It's all going to get scratched and chipped once it's on the road anyway.
Starting to come together now ... !


- 2000 grit wet and dry by hand
- Farecla G3 liquid on an Farecla Advanced G-Mop compounding foam by rotary polisher
- 3M Ultrafina SE on a 3M perfect-it 3 high gloss polishing pad by rotary polisher
I'm getting pretty confident with the polishing now so will probably press ahead and get it looking respectable and on the road and worry about some of the fine detail later otherwise I could spend forever getting it all perfect. It's all going to get scratched and chipped once it's on the road anyway.
Starting to come together now ... !


Subscribe to:
Posts (Atom)