
Blyton Park was the venue just outside Gainsborough in Lincolnshire. The day was organised by Gardner Douglas through Javelin Trackdays to try and get as many examples of their car on track at the same time as possible. It was a great turn out, I think there was something like 20 Cobras and 5 T70's mixed up with a few other marques such as Lotus Elise, Caterham 7's, MX5's, BMW etc.
Although I've had a few opportunities to drive on a track before they have all been under the watchful eye of an instructor and been "driving experience" days rather than proper trackdays so I didn't really know what to expect.
The day started with a driver briefing and an instructor talking us through the track layout and the best places to overtake which had to be done in a gentlemanly fashion and by invitation only. There was a lot of emphasis in making sure everyone knew this wasn't racing and anyone showing any overt aggression or overtaking on the wrong side would be asked to leave. There was also some guidance on entering and leaving the track and some instruction on the use of safety flags, yellow for "caution, no overtaking", red for "session over, leave the track" and black for "we have some concerns about your driving, please leave the track and come talk to us !"
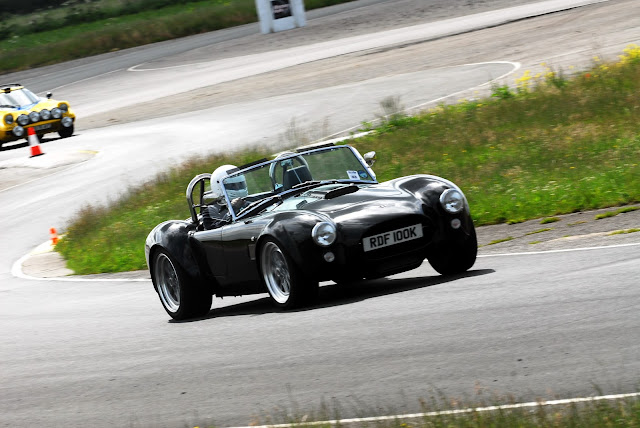
Following the briefing, we had three sighting laps which involved going out in groups behind a pace car to get a feel for the track and learn some of the corners before being left to our own devices. I climbed into my car, strapped myself in, donned my helmet and pulled into the feeder lane which is controlled by a traffic lights system and used by the marshals to feed you into a gap and join the track in a safe manner. We had previously been given wristbands to wear which signify we had signed on and taken the safety briefing and and had to be shown to the marshals before joining the track. So with a flash of the wrist band I pulled up to the lights and waited my turn. I was really trying to stay calm, trying not to let my nerves get to me and desperate not to do anything silly. But, sitting behind a throbbing 6.2 litre V8 engine in a 4 point harness and crash helmet waiting for the lights to turn green got the better of me and I shot up the first straight with the wheels spinning and the rear end snaking behind me. That was a bit of an eye opener and I could just see myself getting black flagged on the opening sighting lap ! The other thing which surprised me was that with my previous experiences, the learning curve was all about how late to brake and where the optimum turn in point was to clip the apex and carry as much speed through the corner as possible. I'm a little embarrassed to say that with all that power and acceleration behind me I hit the point at which my bottle went long before I'd reached any braking point for the first corner. The learning curve on this occasion wasn't how late to brake but how to reach the corner under control without the jerkiness and instability which can be brought on when backing off too suddenly. As for carrying speed through the corner, well it carried plenty and was far more stable through the corners than I was expecting. So, still a lot to learn but I never built this car to be a track monster and given the time and expense put into this project, I probably wouldn't be comfortable driving it on it's ragged edge anyway... well at least for now ! What I did learn was that this car is far more capable than I'll ever be and you'd have to be doing something pretty stupid to get anywhere near it's limit during normal or even "spirited" driving on the road.
With all that said, I've just booked my second trackday, same venue in September so with a bit of experience under my belt it will be interesting to see how I feel after the next one.


Although I've had a few opportunities to drive on a track before they have all been under the watchful eye of an instructor and been "driving experience" days rather than proper trackdays so I didn't really know what to expect.
The day started with a driver briefing and an instructor talking us through the track layout and the best places to overtake which had to be done in a gentlemanly fashion and by invitation only. There was a lot of emphasis in making sure everyone knew this wasn't racing and anyone showing any overt aggression or overtaking on the wrong side would be asked to leave. There was also some guidance on entering and leaving the track and some instruction on the use of safety flags, yellow for "caution, no overtaking", red for "session over, leave the track" and black for "we have some concerns about your driving, please leave the track and come talk to us !"
Following the briefing, we had three sighting laps which involved going out in groups behind a pace car to get a feel for the track and learn some of the corners before being left to our own devices. I climbed into my car, strapped myself in, donned my helmet and pulled into the feeder lane which is controlled by a traffic lights system and used by the marshals to feed you into a gap and join the track in a safe manner. We had previously been given wristbands to wear which signify we had signed on and taken the safety briefing and and had to be shown to the marshals before joining the track. So with a flash of the wrist band I pulled up to the lights and waited my turn. I was really trying to stay calm, trying not to let my nerves get to me and desperate not to do anything silly. But, sitting behind a throbbing 6.2 litre V8 engine in a 4 point harness and crash helmet waiting for the lights to turn green got the better of me and I shot up the first straight with the wheels spinning and the rear end snaking behind me. That was a bit of an eye opener and I could just see myself getting black flagged on the opening sighting lap ! The other thing which surprised me was that with my previous experiences, the learning curve was all about how late to brake and where the optimum turn in point was to clip the apex and carry as much speed through the corner as possible. I'm a little embarrassed to say that with all that power and acceleration behind me I hit the point at which my bottle went long before I'd reached any braking point for the first corner. The learning curve on this occasion wasn't how late to brake but how to reach the corner under control without the jerkiness and instability which can be brought on when backing off too suddenly. As for carrying speed through the corner, well it carried plenty and was far more stable through the corners than I was expecting. So, still a lot to learn but I never built this car to be a track monster and given the time and expense put into this project, I probably wouldn't be comfortable driving it on it's ragged edge anyway... well at least for now ! What I did learn was that this car is far more capable than I'll ever be and you'd have to be doing something pretty stupid to get anywhere near it's limit during normal or even "spirited" driving on the road.
With all that said, I've just booked my second trackday, same venue in September so with a bit of experience under my belt it will be interesting to see how I feel after the next one.


.jpg)
