GD427 in action

GD427 in action
Showing posts with label Interior. Show all posts

Saturday, 8 June 2013

Boot Carpet

One little job I never got round to completing last year was fitting the carpet into the boot. I think after all the faffing about I had fitting the roll hoops, the thought of taking them out again to fit the carpet was not top of my "fun things to do at the weekend" list.
However, time to bite the bullet and get on with it !
One of my concerns was cutting the holes for the roll hoop legs and getting the hole lined up for the petrol tank filler neck as this was a lot closer to the boot opening and any mistake here would be difficult not to notice. The filler neck is also slightly slanted to one side so any mark made as an impression onto the bottom of the carpet would need to be offset so the whole made lined up with the bottom of the neck rather than the top.

I decided to try and make a reference point for the bottom of the filler neck in relation to the roll bars by using pieces of paper with the relevant size wholes cut in them and a slit made to the edge for easy removal. I placed them into position and then taped them together to make a "map" of the holes which needed to be cut, hopefully with good reference to each other.


I then decided to go the whole hog and "map" out the whole boot floor with the theory being that as long as I could get three pretty reliable marks on the underside of the carpet where the wholes should be cut, I should be able to use these as reference points to mark out all of the others.


One I'd removed the paper "map" from the boot I went about the arduous task of removing the roll bars, although I must admit I'm getting pretty good at it now, and laid the carpet in position. Then using a piece of chalk from underneath, I did my best to mark through the holes in the boot floor onto the underside of the carpet. Unfortunately I couldn't use a previous method I'd tried of first marking the edge of the holes with chalk and pushing the carpet down onto them as I'd now placed flat rubber doughnuts over the holes to take up the space between the roll hoop legs and the holes I'd cut and provide a watertight seal to stop water coming up into the boot from beneath.

Anyway I managed to get a few good marks and when removing the carpet and laying my "map" over the underside (after remembering to turn it over), everything seemed to line up pretty well.


I sat in the sun with a cup of tea in hand pondering my methodology and whether I'd missed anything or hadn't thought it through properly. It all seemed sound so the time came to cut the holes and see if it would fit.


Quite happy with that !

I've still got a little finishing off to do but the difficult bit is over.
 

Sunday, 8 July 2012

Interior finished

Other than replacing my "just for now" steering wheel, the interior is now finished. I've fitted the dash and steering column for the last time having tested all the electrics and I'm very pleased to say everything works as it should, including the additional circuits I added myself.


  • Neutral Safety Switch - Engine only starts if the clutch is depressed, check !

  • Reverse Lockout Solenoid - Reverse can only be engaged with clutch depressed and brakes on, check !

  • Hidden drop down 12v socket under dash - powers SatNav, charges phone etc, check !

  • and last but no means least, heated seats - nice warm bottom, check !


Door Cards

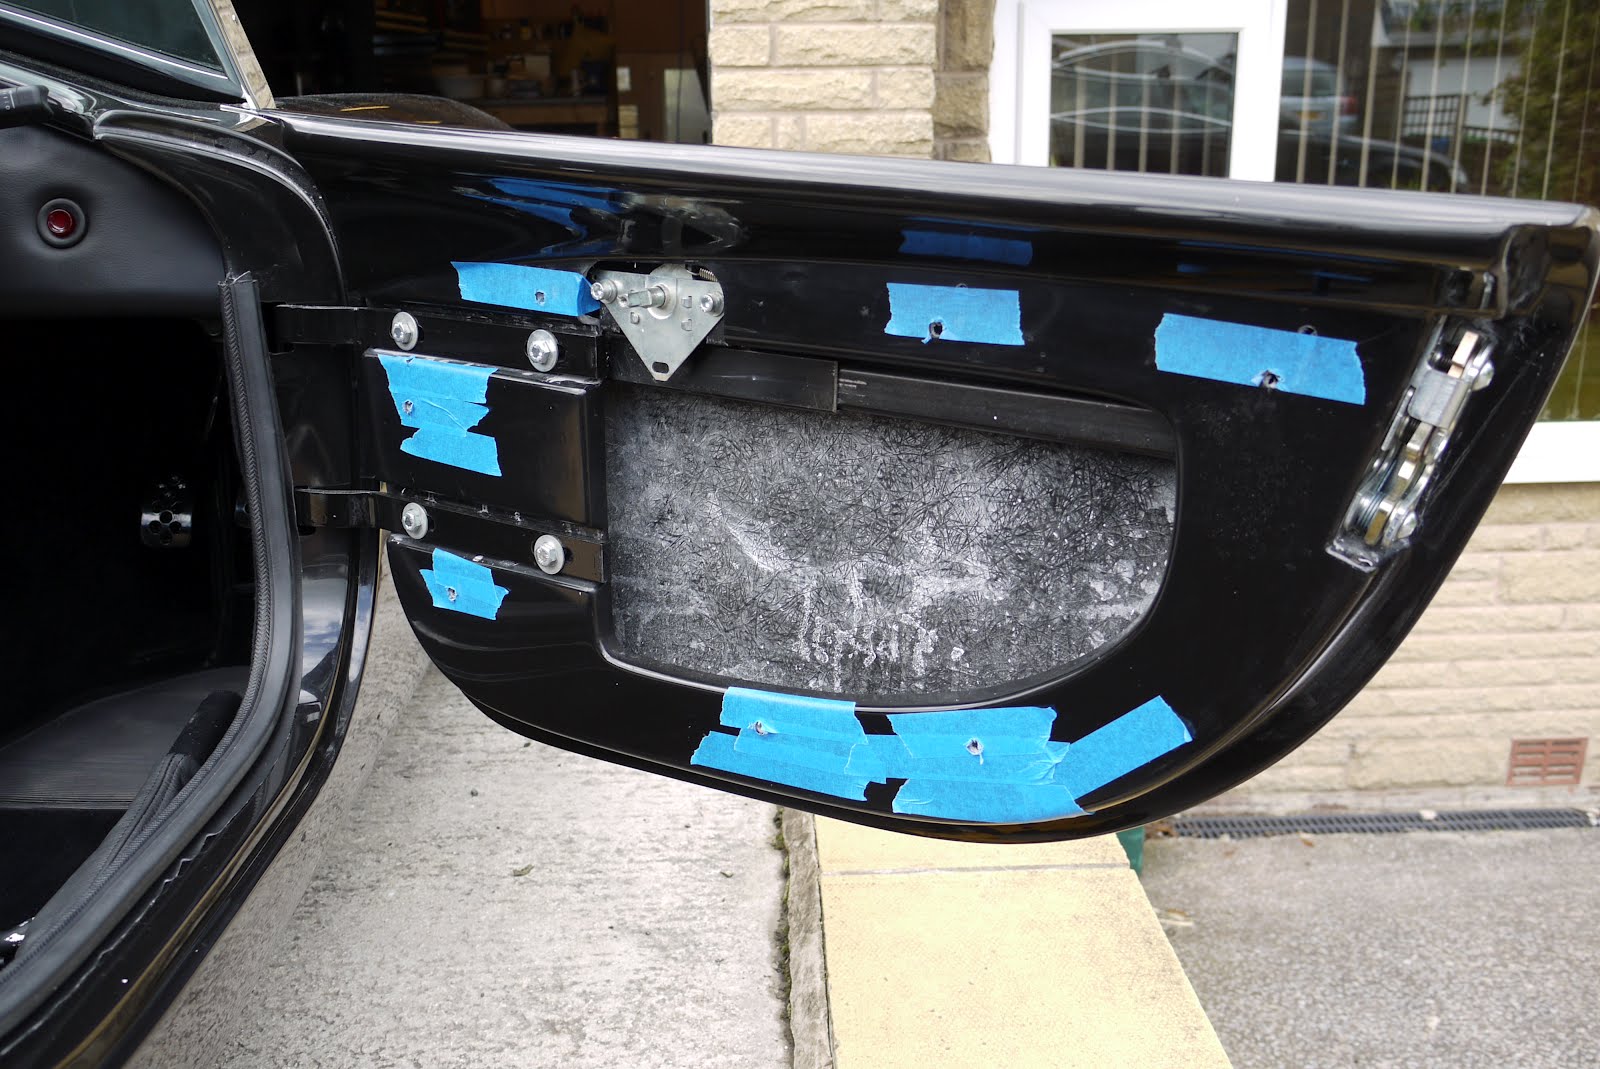
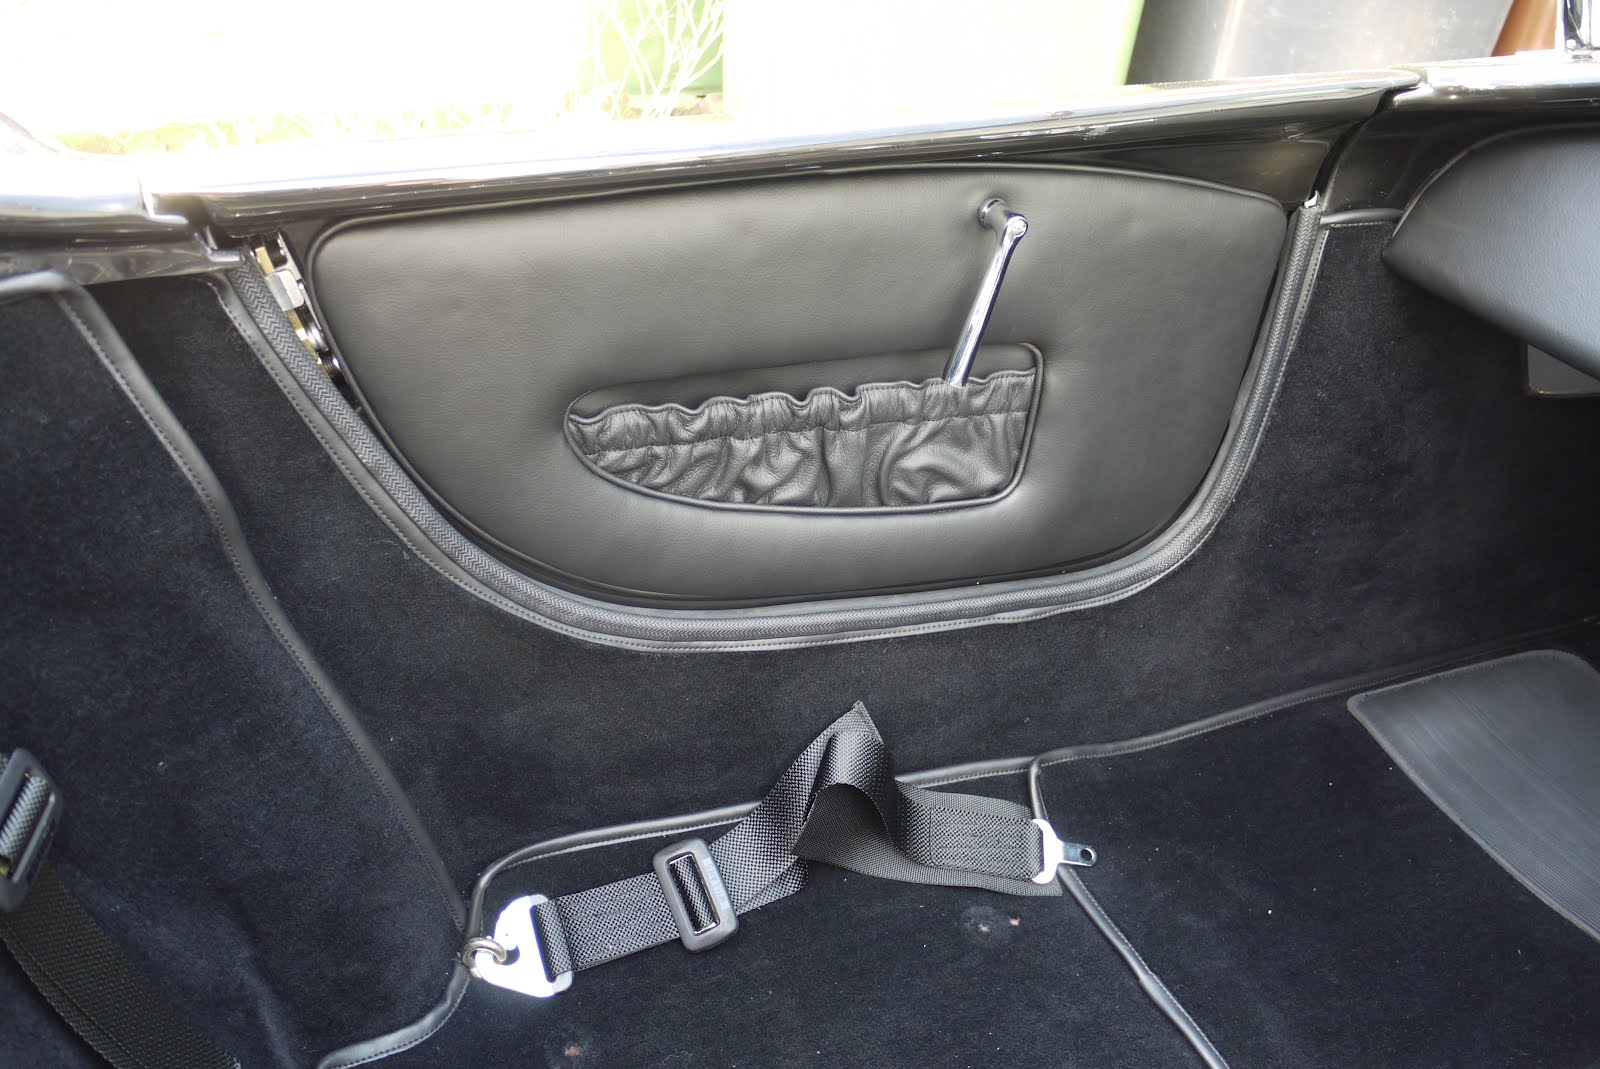
Next up was the door cards. These come premade with the fixing clips supplied. I made a bit of a mess with the first one largely because I assumed the orientation of the clips should be vertical but they were too close to the edge and fouled the rear of the leather where it folds over onto the rear of the card. I changed tack and fitted the clips into the card horizontally which gave no clearance problems and made the job a lot easier. The clips were quite a tight fit into the card and the cards are quite light so I'm not worried about the card dropping once fitted. The method involved punching a hole through the leather to line up with the door handle and then by placing the top row of clips into the card and marking the end with a marker pen, you use the door handle as a point of reference and push the card onto the door transferring the marks from the end of the clips onto some masking tape stuck to the inside of the door. Drill these marks out to 7mm, repeat the same technique for the others and the door card clips into place. Before fitting I took a picture of the rear of the card, noting the orientation of the clips which will make things easier should I ever have to remove it.


Same technique for the other side which was a lot easier and a lot faster having learnt all my lessons on the first one

Gear shift gaiter

A busy weekend, it managed to stay dry for most of and I got quite a lot done in which was supposed to be the last weekend before my IVA test but I've still not had my date through. Oh well, press on regardless.

The first thing I did was to fit the gaiter which covers the gear shift. The leather is secured by a stainless steel ring and needs to be pulled out around it's edges to fit underneath. Using a needle, I I threaded some cotton through the edge of the leather so I could pull it outwards from underneath the plate


By pulling on the cotton threads and then tightening down the escutcheon plate with some self tapping screws, I managed to pull the leather into place and trap it at the same time. Then it was just a case of removing the protective film, eh voila !

Sunday, 1 July 2012

Seats in

Kinda lost my way over the past couple of days, been running around doing little bits here and there, finishing off the odd job where I'd used a standard nut but meant to use a nyloc, tidying some of the cable runs, trimming the ends off cable ties ect. and thinking about the IVA.

In terms of milestones, I've fitted the harness eye bolts after painting the load spreading plates black which go under the floor. I also fitted the eyebolts into the roll bars. As the roll bar contains a captive nut in the form of a threaded sleeve, in order for the eyebolt to tighten into the correct position you have to add or remove washers so it's vertical when fully tightened.


I fitted the handbrake gaitor, the one supplied is made from thick stainless steel and I wasn't sure how it fitted, it appeared that it had to be bent to follow the contour of the floor in this area and rather than risk making a mess of it, I made a copy in aluminium as a trial. The ally one fitted perfectly and as you can't even see it when the seat is fitted I'll leave in place for now. If the seats ever have to come out again, I'll fit the stainless one.


Once the harnesses were in I couldn't resist trial fitting a seat.


And once you've started, well, it would be rude not too !


Only the door cards and gearstick to go and the interior will be finished.

Tuesday, 5 June 2012

Floor carpets pt 1.

I stole and hour or so in the garage today to finish glueing the piece of carpet to the rear bulkhead and to fit the rear floor carpets. These aren't glued in but held in place by nature of the harness eye bolts and seats runners bolting through them. I'd previously drilled the holes for the harness and seats and by placing the carpet in position and then carefully pulling it back and marking the hole edges with a piece of chalk I could lay the carpet back down and transfer the marks onto the rear. Removing the carpet from the car, I used a punch to cut out the holes. Here you can see it laid back in with bolts pushed through the holes to make sure it all lines up. This is the drivers side and you can see I still need to cut around the handbrake mount which I'll try and do tomorrow. The wire and connector you can see at the rear is for the heated seats.

Monday, 4 June 2012

More carpet

Stuck a bit more carpet in today, I still need to finish along the bottom edge so have only stuck the top half at the moment. I've got cables running along the bottom and the carpet needs trimming around the area where the harness eye bolts go through the floor. I'll sort these areas out first and then stick the rest of the carpet down. There's only the floor mats to do now. The rear one is held in by the seat and the front one is held in with carpet fasteners.

Sunday, 3 June 2012

Dash Finished

Well, the plan was to do a Dash Leather part 2, part 3 etc. but I just got carried away so we'll jump straight to Dash finished. After I'd temporarily fitted the gauges, I stuck the leather tabs down on the rear of the dash and cut out the holes for the warning lights and switches using a punch. I didn't have a punch of exactly the right size but I found that because the leather had some give in it and to a point was stretchy, I could use a punch a little smaller and gently ease the warning lights and switches through the slightly smaller hole.


It all went together relatively easy so it was onto the piping around the aperture for the steering column and then along the top edge. The piping looks a little odd in the pictures but I left it a little high along the top edge so that when the dash is in position it folds down nicely.


One area which gave me a little to think about was the lucas switches which came with either a round fixing ring or a hexagonal nut like fixing ring. I've seen other builds which had the rings all matching so I set off on a mission to find either more hexagonal nuts or round rings so they all looked the same. The solution was relatively straightforward in the end and I bought a couple of spare round fixing rings from SVC but at £5.50 each I was a little taken aback ! Anyway, it's done now and I'm glad I bit my lip and pressed ahead as it looks much better with them all being the same.


So onto my chosen layout, I've basically put all the gauges which I consider to be the most important along the right hand edge of the triangle so they're easier for the driver to see, oil pressure, water temperature and fuel.


I hadn't stopped to think whether there was a standard layout for the gauges and found that when I fitted the dash loom on the rear some of the wires needed a little help to reach their intended position. With the integration of the standalone Mast wiring loom I'm using for the engine management, I had to make some slight alterations and put some extra wires in for ignition, rev counter, malfunction indicator light (MIL) and water temperature which I'm driving from the Mast ECU rather than a straightforward sender.
I also had to put an extra earth wire in for some modifications I've made to the windscreen wiper circuit which now has an intermittent wipe feature. It looks like a dogs dinner at the moment and I may try and tidy it up but I need to test it first so I'll wait to find out if it all works before I mess with it anymore. It is all very secure though and I've lost count of the number of zip ties I've used to hold it all in place.


In addition to the wiring, the loom also needs a voltage stabiliser fitted which regualtes the voltage down to 10v for some of the instruments which takes out inaccuracies caused by the fluctuating voltage of the main loom caused by the alternator cutting in and out as required to charge the battery. I bolted the regulator across the fixing brackets used to secure two of the small gauges.


Got a bit of work to do to the wiring in the car which connects into the dash loom and steering column switches, ignition, indicator stalks etc. then I should be in a position to connect it all together, connect the battery and give it a test.

Saturday, 26 May 2012

More carpets

Finished sticking the carpet down on the transmission tunnel, this is now stuck all the way along the top and down both sides. The only tricky bit I had was cutting out for the gearstick. First I marked the edges of the hole with chalk and then by pressing the carpet down, it transferred the chalk line and left a mark where to cut.


Cut out and stuck down


Followed a similar method for marking out around the extended footwell.


And then just because I'm starting to trip over things and needed to get them out of the way I loosely placed the seats in and mounted the dash and the moment I did, I instantly had two little helpers ! Still it's gives a great idea of how it's going to look and I must admit, after they'd gone I did have a little sit in it myself :-)

Carpets

I've finished extending the wiring for the heated seats, which will run under the carpet so it was time to glue the first piece in. This lies along the transmission tunnel from the rear right up to the front bulkhead and under where the dash will mount. The support bar which runs across the car between the windscreen legs bolts down onto the transmission tunnel so I needed to make some holes for the bolts to pass through. In order to mark them accurately I cut down a couple of bolts and cut a slot in the end so I could fix them with a screwdriver into some jacknuts I'd previously fitted as securing points.


Leaving them a little proud and placing the carpet over the top allowed me to make an indentation in the underside of the carpet by tapping the area lightly with a wooden mallet.


A hole was then made using a punch and after a little double/triple checking, the carpet was glued down.


I used a plastic spreader (hotel room key card) to spread the glue over the two surfaces which gave a good even coverage and worked really well. Once the carpet was stuck in, I could put the support bars back and bolt it down using some washers as spacers between it and the carpet.

Dash Leather pt 1.

After I'd let the glue set I turned my attention to the ends which needed to have small V section cut into the edge to allow it to curve around the corner. It was a bit fiddly especially the the very last end piece which needs to tuck back and overlap itself but it worked out OK. There was also a little trimming required where the leather overlapped some of the holes for the gauges.


Next step was to cut some holes and fit the gauges. I must admit this was one of those jobs where I was just going to do one and see what it looked like. From the rear, I divided the holes into 16th's and using a Stanley knife carefully cut through the leather stopping about 5mm from the edge of the hole. I should've known better especially after reading other accounts of this part of the build, once you start, you just can't stop yourself


For the time being I haven't glued the tabs down on the rear yet, I wanted to see how the leather sat before I decided how much tension to put into it. In the pictures, I've just pushed the gauges through the holes, I haven't pulled on the tabs at all and it looks about right so I'll try and stick them down as they are. I'm using Evostick time bond which gives you a few chances to get it right before committing yourself, that's perfect for me !

Saturday, 19 May 2012

Carpet

Well, couldn't help myself, here's a picture of all the carpet laid out. Looking back at it, I think some of the pieces laid across the front should fit at the rear in the boot but I'll work it all out when the time comes.


And then just for fun, I laid the centre section in to see what it would look like. There's been a few milestone moments during this build when you look back and say to yourself, "it's really starting to look like a car now!" Well this was another one.


The loose wiring you can see is as result of removing the screen brace and dashboard support which have to come out to fit the carpet.

Interior's here.....!

The interior has arrived. I was going to lay it all out and take a picture but there's so much carpet it wouldn't all fit in the lounge. Perhaps if we have a nice day I'll lay it out on the drive and take a picture. I'm sure it'll start to make sense as I start to put it in but at the moment I just can't imagine where it all goes. Anyway, here's a picture of the seats. I moved slightly away from tradition and went for the optional headrests. This was mainly for the safety aspect which would be maintained no matter the position of the seat rather than rely on head rests mounted to the roll bars. The other reason was that I plan to enjoy using this car with the whole family including my two daughters, when the eldest sat in the seats her head was above the height of the seat back but not high enough to make use of a roll bar mounted head rest which placed the back of her head directly in line with the rear edge of the cockpit. It would only take her to hurt herself once to spoil the whole experience for me so better safe than sorry.


Other than the vast amount of the carpet, the other surprise I had was that the heating elements I had fitted into the seats came with their own wiring loom as part of the kit. The past weeks of planning and head scratching over how I was going to wire these in with all the different relay options, switches, wire sizes etc wasn't necessary. I may have to extend some of the wires but that side of the build now seems very straightforward. The next step will be to cover the dash blank with a layer of foam and then leather before cutting out all the holes for switches, gauges etc. Hopefully I'll get to that this week and then in with the carpet. I guess it's time to start thinking about IVA !

Sunday, 1 April 2012

Windscreen refitted

The windscreen is now back on for good and I've fitted the escutcheon plates around the bottom of the screen legs and those for the windscreen demist vents. The plates around the bottom of the screen were bent slightly to match the curvature of the body in this area and the holes through the body and the underside of the plates sealed with clear silicone. I've also fitted the demister "funnels" (?) which fit under the vents and direct the air onto the windscreen. These are held with the same bolts which secure the escutcheons so the two are done together. A little tip for anyone approaching this stage, I had trouble getting the bolts to screw into the threaded bolt holes in the "funnels". This was due to a layer of paint which had built up so I ran an M5 tap through them to clear them out which made the job so much easier.

Wednesday, 28 March 2012

Interior Ordered !

Ordered the interior today. There's a bit of a lead time as it's made to order but once it arrives I'll have all the parts I need to finish the build. Exciting times !