GD427 in action

GD427 in action
Showing posts with label Cock Ups. Show all posts

Sunday, 8 July 2012

Door Cards

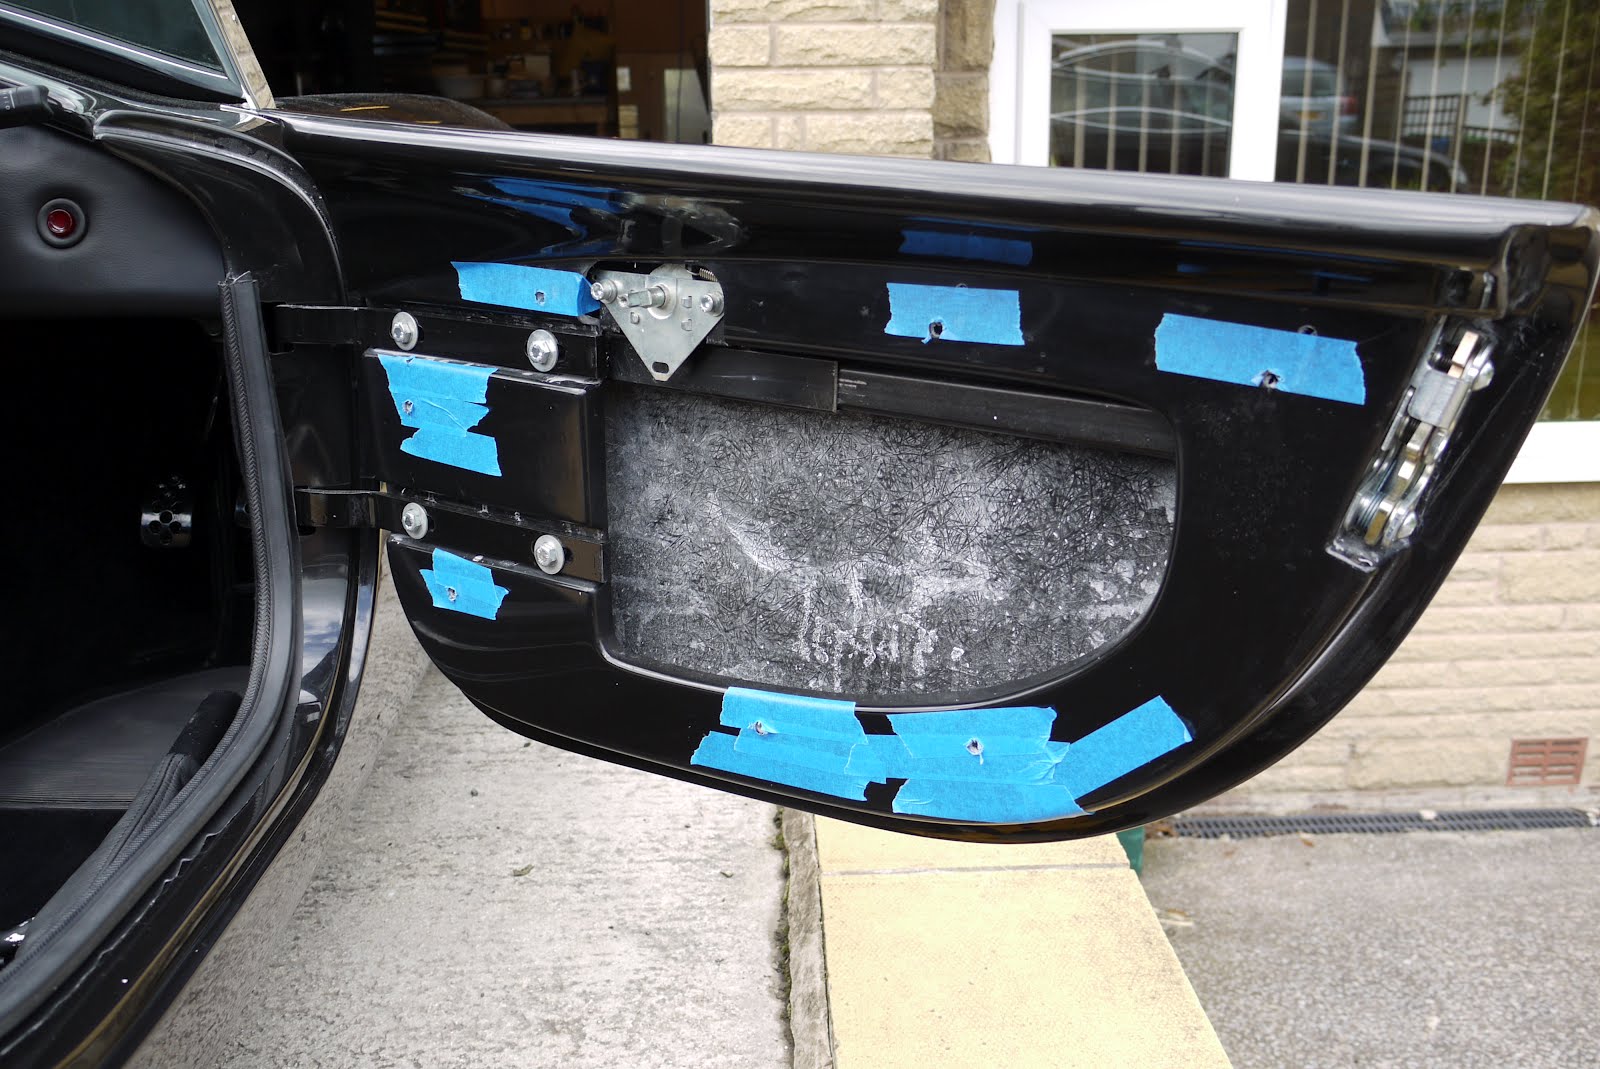
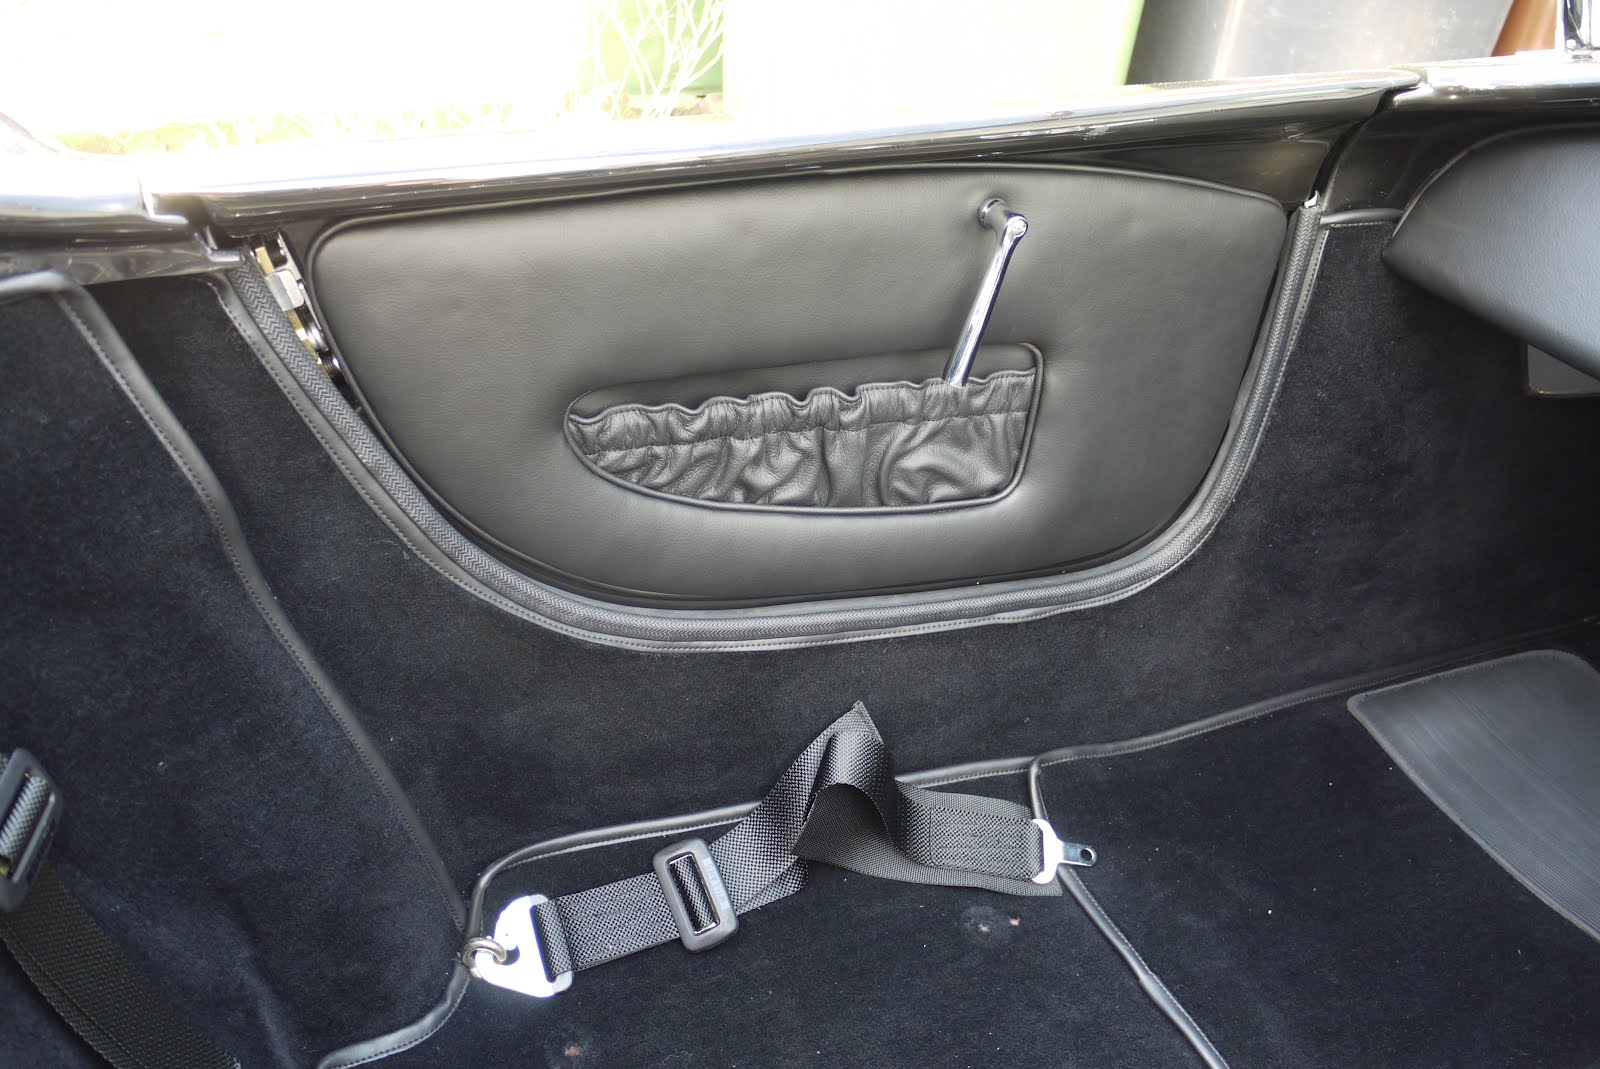
Next up was the door cards. These come premade with the fixing clips supplied. I made a bit of a mess with the first one largely because I assumed the orientation of the clips should be vertical but they were too close to the edge and fouled the rear of the leather where it folds over onto the rear of the card. I changed tack and fitted the clips into the card horizontally which gave no clearance problems and made the job a lot easier. The clips were quite a tight fit into the card and the cards are quite light so I'm not worried about the card dropping once fitted. The method involved punching a hole through the leather to line up with the door handle and then by placing the top row of clips into the card and marking the end with a marker pen, you use the door handle as a point of reference and push the card onto the door transferring the marks from the end of the clips onto some masking tape stuck to the inside of the door. Drill these marks out to 7mm, repeat the same technique for the others and the door card clips into place. Before fitting I took a picture of the rear of the card, noting the orientation of the clips which will make things easier should I ever have to remove it.


Same technique for the other side which was a lot easier and a lot faster having learnt all my lessons on the first one

Sunday, 17 June 2012

Electrics

Well I finally plucked up courage and connected the battery today. All circuits worked OK except for two which kept blowing fuses. A bit of detective work sorted the first, the sidelight bulb was damaged and where the terminals pushed into the holder it was creating a short. The second I've not solved yet. On accessory power i.e. first position on the ignition, if I put everything on i.e heater, wipers, washer, sidelights and fog light and then flash the headlights, the bulb blows. It isn't a problem on the second position just the first. It suggests the fuse for the accessory circuit isn't rated high enough but I want to be sure before I mess with it. Either that or refrain from sitting there with my lights on, in the fog, with the engine off, heater on, washing the windscreen with the wipers going and flashing my headlights at passers by.

I'll try and post some pictures later in the week but the other achievements were fitting the side repeaters, fitting the windscreen washer jet and the windscreen wipers and finally fitting the windscreen centre stay which was a bit fiddly and necessitated cutting down an Allen key to fit.

I also fitted the front floor carpets and started painting the underfloor strengthening plates for the seatbelt harnesses.

One setback I had today concerns the wiper motor. When I originally fitted it I checked the park position and decided it was correct, result ! The more I thought about it and looked at other cars made me decide it was wrong after all so I had to take it out again, take it all apart and move the small plastic "ramp" inside which dictates which side it parks on. This wasn't too difficult but I did have a little trouble getting it all back together. Anyway, turns out I was right the first time, if you look at a cobra you'll notice the wipers park on the opposite side to a normal car, well that's true for my car anyway. So I had to take it out again, only this time, the dash under trays, wiring looms and carpet have all been added which made it a little more tricky. In addition, it turned out I had slightly damaged the end of the wiper motor shaft when I refitted the circlip and I couldn't now get the shaft out of the casing. I ended up having to drift it out with a punch which also pulled the press fit bearings out ! So a simple job which was right the first time took me all afternoon to put right... again, including getting grease all over my lovely new carpet :-(

Sunday, 29 April 2012

Brake Light Switch

I took a look at the pedal box today with a view to fitting the brake light switch. While I was at it I also took the opportunity to "persuade" the pedals in a vice to give me a bit more clearance for my size 9's. The brake light switch mounts on a bracket supplied by GD which bolts onto the face of the pedal box and holds it in position against the brake pedal itself. This gave me an idea for the circuit I'm putting together to control the reverse lockout solenoid. I've posted about it here "click". I'm planning to use a second brake light switch mounted against the clutch pedal to make the reverse lockout circuit "live" when both the brake pedal and clutch pedal are depressed. The theory being you'll only want to put the gearbox into reverse whilst you've got your foot on the brake and the clutch depressed. This also gives me a circuit to control the neutral safety switch which I'm going to wire so the clutch has to be depressed before the engine will start. Hopefully this will help avoid any mishaps which might occur trying to start the engine in gear ! Anyway, I made bracket, the same as the GD one, to hold a second brake light switch for the clutch pedal. Just got to get a second switch now and we should be away!


One area that give's me a little concern is that when placing the brackets on the front face of the pedal box I didn't look to see what clearance I had behind. Where the holes come through doesn't really leave enough room to fit the nut and washer on behind. I had a feeling this might be the case after drilling the pilot holes so I made the final hole a little smaller than needed for the bolts to pass straight through and cut a thread into the pedal box instead. It all bolted up nicely and seems OK I'm just not 100% sure on the strength of cutting a thread into cast aluminium. I guess time will tell!

Sunday, 18 September 2011

Roll Bars Revisited

After the dust had settled I went back and had another look at the roll bars. In fairness, the holes weren't too far out but they did need a little bit of work. I've narrowed the problems I had down to two reasons.

1. The first set of bars fitted fine but for the second, it wasn't obvious which way the holes needed enlarging when they wouldn't initially fit. They appeared to be tight against the bodywork but in reality there were simply leaning forwards because of the third leg hanging into the cockpit. If I'd had the chassis level I could have checked the vertical.
2. I hadn't taken account of the flex required in the third leg, I allowed for the main legs but cut the rear hole to fit the bars in their unflexed state. Once flexed to fit the mounting points, the hole had been enlarged in the wrong direction.

I didn't take pictures of every step in the repair but with the few I have and a desription, hopefully you'll be able to follow what I did.
The first thing I did was to tape a piece of 1mm rubber mat around the roll bar where it passed through the body. I then cut a curve into a square of grp matting and glassed it in on the underside of the rear deck, up to the rubber mat wrapped around the roll bar. The rubber mat was to protect the roll bar and once removed, to give me some clearance to remove the roll bar afterwards.


When it had set, I filled the gap I'd created with Isopon p40 filler and then when that had set, removed the rubber mat and then the roll bar itself leaving a new fillet of grp filling the space which I had previously over enlarged.


Now because I had filled up to the roll bar itself, the repair was too much and needed cutting back to give the required clearance of 5mm all the way round.
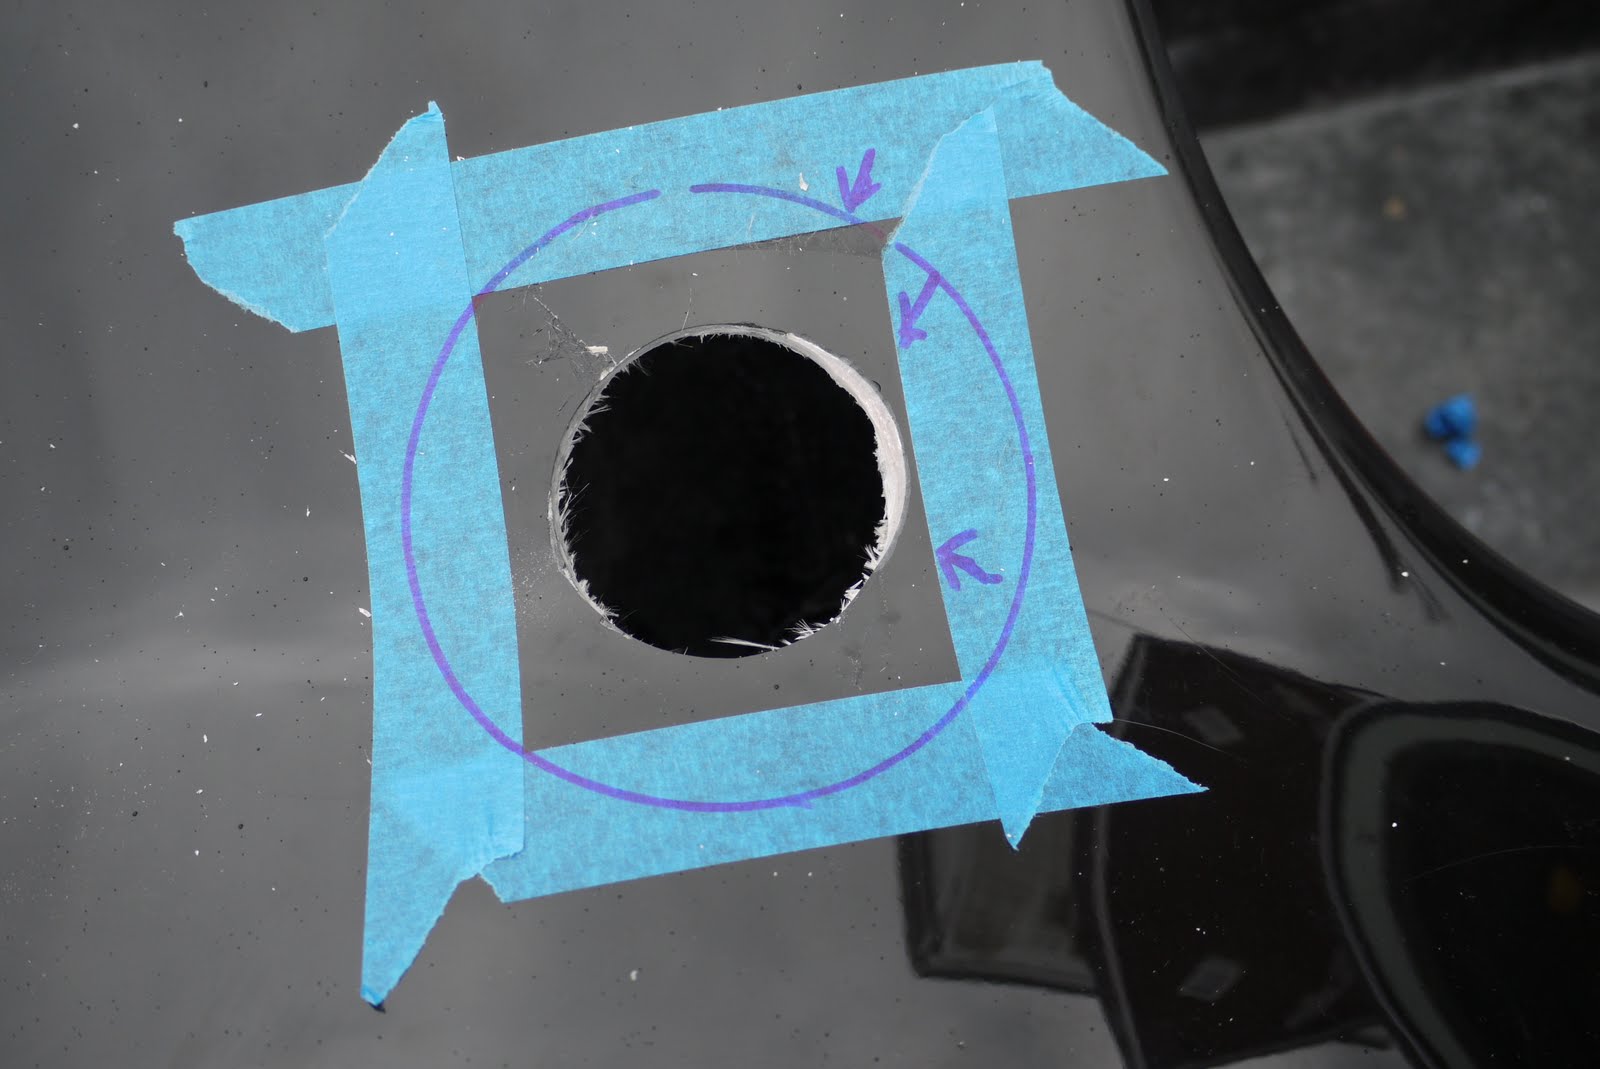
Prior to making this repair I had cut two doughnuts out of a 1mm rubber sheet, both with the same outside diameter but one which had the same inside diameter as the roll bar and the second with the diameter that the hole needed to be, including the 5mm clearance. With the roll bar in position I placed the first doughnut around the roll bar and marked the outside circumference. With the roll bar removed, I placed the second doughnut into position, carefully lining up the outside circumference with the marks made for the previous doughnut. I now had a reference point to enlarge the hole, along with the repair, to give the neccessary clearance.


Once the hole had been enlarged to match the inside circumference of the second doughnut, the filler was also cut back on it's surface ready for gel coat to be applied.


Once the gel had gone off, it was rubbed down level to the bodywork and repolished before the roll bars were refitted to see if it had all been a success...


There may still be a little fettling required but it looks good to me and with the grommet fitted, nobody would ever know...!


A couple of gratuitous shots to show how it's looking.


Monday, 1 August 2011

Site re-ordering

Just realised my attempt at ordering the blog site labels using 1. Introduction, 2. Body, 3. Heater etc. isn't working because this blog site thinks the order should be 1., 10., 11., Oh well, I may try and sort it out if I get the time.

Friday, 25 September 2009

Fuel Filler Cap

GD had very kindly, clearly marked onto the body the position and exact size of the hole needed to mount the fuel filler. I then, very clearly, drilled the hole too big. Entirely my fault, working late into the evening, getting a bit carried away and just used the wrong size hole saw. Used a 76mm hole saw when I should have used a 64mm.


Now, you can always make a small hole bigger but making a big hole smaller poses a few issues. I guess there a few ways I could've tackled this, I understand there is a filler cap with a larger flange which would've covered the mistake but it looked a bit ugly to me and cost about £80. I could've made a collar to fit inside the hole and reduce the inside diameter but how would I fix it in place. An additional challenge faced me in that when I measured the fuel filler in the hole, the fixing bolt holes were directly in line with any repair I attempted to make meaning that whatever solution I chose it had to be strong and solidly fixed to the body. In the end I chose to re-affix the part I had drilled out which was still lodged inside the holesaw after I abandoned it in digust onto the workbench. Luckily there were enough marks left on it from the original masking tape that I could use as a guide to position the piece precisely where it had come from. I then used additional masking tape and drew some guideline upon it to ensure I had it positioned correctly before suspending the part in it's orginal position using a couple of battens and using a fibreglass kit to place a strip either side and glass the piece back into position from the underside.


Once the initial repair was dry, I removed the batten, placed a strip of fibreglass in the middle and then two extra pieces which covered the whole area.

I then filled the hole which was left by the original holesaw cut with some fibreglass filler before cutting back with the trusty Dremmel and filling with gelcoat and sanding back with wet n dry.


I was quite pleased with the end result and whilst perhaps not as good as it could have been, it was far better than it needed to be considering it would all be covered by the flange on the fuel filler anyway. The hole was drilled once more, this time with the correct size holesaw and finally, as a belt and braces job, I made a plate from 2mm aluminium to fit on the underside of the body for the fixing bolts to pass through and strengthen the whole thing up, effectively clamping the repair between the plate and the filler itself. I will need to get some longer bolts to pass through the extra thickness of the body.
Whilst I would never have chosen to follow this path, I did quite enjoy myself and learnt a little about fibreglassing along the way.... can you tell I'm still trying to put a brave face on....sob, sob !

A new section

Not posted for a little while. A few reasons, been busy working on the house, been busy at work, been ill with the worst bought of flu imagineable (for me anyway) and the recent work completed on the car hasn't really gone to plan....hence a new section to the site.... cock ups. Hopefully thee won't be too many posts :-)