GD427 in action

GD427 in action

Sunday 7 October 2012

8 weeks on

Well the Cobra has been on the road for about 8 weeks now and in that time I've clocked up around 350 miles most of which has been on a local run I've worked out over the hills to the next village and back. I'm starting to get a feel for the car but just when I feel the confidence is growing, it sends me a reminder "treat me with respect or I'll bite you", today being a good example!
My parents had come to visit for the weekend and as the sun was shining it was a good opportunity to take my Dad out for his first ride. He's backed me all the way with this project and if wasn't for his help I'd still be some way off completion so it was a real pleasure to take him out on a run.
My Dad's first impressions were good and he said he was surprised how well mannered it was, he'd imagined the power would be a little more "on" or "off", the beauty of the LS3 engine I guess as the car is very easy to drive at low RPM. The run out over the hills saw a few small opportunities to exercise the right foot and give my Dad a little feel of what the car is capable of, all within the legal limit of course, just getting up to it rather quickly. It was on the way back however that I was reminded who the boss was! I'd just pulled away from my usual turning spot and as I changed up into second gear I guess I must have leant on it a little hard, both rear wheels broke traction, the back slid out and we went up the road sideways amidst a trail of screeching tyres and burning rubber ! Thankfully I managed to regain control and get it pointing back in the right direction.
The ride back was a little more sedate after that, a good lesson learnt I guess, just a bit embarassing to learn it with my Dad in the car!

Friday 24 August 2012

Pre IVA Checks

I thought it might be of interest to post a few details of steps taken in preparation for IVA. A few pictures will make a nice change after the last couple of posts !

Fog light E-marked and baffles fitted to ensure noise level acceptable.


Outside edge of harness buckle is deemed to be outside of cockpit and needs to meet radius requirements for exterior. The rubber around the washers behind the eye bolt is self amalgamating tape in case the edge of washers are deemed to require a radius.


Boot T-handle edges need to be blunted.


Steering wheel needs a padded centre.


Alternative side vents without sharp edges, holes (needed for heater inlet on GD) drilled 20mm and rubber grommets from electric socket backbox used.


Door handles fitted with rubber caps.


Interior mirror "stem" fitted with rubber cap.


Vectra controls remarked to shown horn operation.


Dash switches marked to show operation. Sticker sheet from Car Builder Solutions


Clock adjustment knob fitted with rubber cap.


Aero style fuel filler cap fitted with tether made from brass picture wire, 2 spade terminals and a short piece of wire coat hanger.


T-piece on other end fitted inside fuel filler neck.


Hex bolt changed for button head on number plate light.


Number plate blank fitted inside nose. This is just a piece of MDF suitably radius'd, painted black and fitted to the number plate bar with rubber lined p-clips.

Sunday 12 August 2012

Venturing out

One week since IVA and I've been out on 4 relatively small runs and just stayed local to get a feel for things. I've done about 150 miles now including the trip to MOT and IVA and today I went to my first "meet" with the local owners club. I have been before but's it's been a while since I've seen anyone and it was good to catch up and meet a few people for the first time. The car is performing flawlessly, it did have a problem with the MIL (malfunction indicator light) light coming on occasionally which seemed to be heat related. i.e. it only came on when up to temperature and once on it stayed on for a bit and then went off. Against all the good points of a modern engine, you have no way of telling what the light comes on for without plugging it into a laptop however, I do also have oil pressure, oil temperature and water temperature gauges which all read normal.

Tongue in cheek - the light hasn't came on as much since I refitted the radiator cap which fell off whilst out on a run so my assumption of it being heat related seems to be ringing true. On today's run out to the local meet which was a coolish day and involved a 15 mile trip either way, motorway there and steady A road on the way back, the light didn't come on once !

Who's the new boy in the corner ?

Thursday 9 August 2012

Post IVA

With the IVA test complete and the sun still shining I brought the car home, had a quick bite to eat and set off with my Dad to the DVLA office to get the car registered. I had to leave the Cobra at home as whilst it had now passed it’s test, I had to have it road registered before I could legally drive it again. The reason I was able to drive it to and from the MOT and then the IVA, was that for travelling to or from a pre-arranged test or examination, the vehicle is classed as being exempt. If you want to read more, it’s covered under the Vehicle Excise and Registration Action 1994, Schedule 2 (Exempt Vehicles), Section 22 (Vehicle Testing etc) “link here and scroll down”.

I arrived at the DVLA office to find a queue that stretched halfway round the building and it was a good 20 minutes before I got to the front desk. It was getting late in the afternoon and the greeting I received showed it. I thought I was going to be in for a real struggle when I told the girl behind the counter what I was there for. She responded with a big sigh and said “right, what paperwork have you got? “ She actually seemed disappointed that I had everything I needed until maybe she realised that because I’d come prepared it wasn’t going to be too difficult for her. She took all the bits and pieces I gave her and disappeared off behind the wall to speak to someone else. She came back in a much better frame of mind but regretfully told me that whilst it would be processed today, it might not be until the following week when I’d receive my tax disc, log book and V948 which is the document you need in order to get your plates made up. I smiled at her and jokingly said “I won’t get to drive it this weekend then ?” She looked at me, smiled back and said “wait here a minute” and disappeared off behind the wall again. This time when she returned, she had a smile on her face and said it would be done today, but I might have to wait for it, maybe 30 minutes. That 30 minutes actually turned into about 10 and I was walking out of the DVLA, tax disc and V948 in hand and on my way to Halfords to have my plates made up.

These last few posts have turned this storey into a bit of a saga, and it doesn’t end here. There’s a Halfords service centre right opposite the DVLA office with a big sign outside saying “DVLA number plates made here “. Perfect, or so I thought ! The chap that makes the plates was on holiday and they couldn’t help me, there was however, another Halfords 300 yards up the road who could so I set off, paperwork in hand with a degree of determination beginning to set in. I chose the plates I wanted, plain, and the letter style, plain, paid the guy and he set to work. It was only after he’d made the front plate that he realised he didn’t have any plain rear plates in stock. After several excuses about the guy who orders the plates being away and he was just filling in and “ooh, I don’t know what to do” I suggested the Halfords service centre 300yds down the road might have the plate but explained they didn’t have anyone to make them, “good idea, I’ll ring them and see if they can help”. When he got off the phone he had a triumphant look about him which told me he’d been successful, what I didn’t realise was that he expected me to go back down the road and get the plate for him. He wasn’t budging and he had no-one else who could go. I bit my lip, hard, and agreed to go, I was not going to come this close and have some spotty face oik ruin my day.

Once I returned, number plate in hand, it became apparent that the plate from the service centre was slightly different to the plate in the shop and it wouldn’t fit through the shop’s plate machine! I was starting to lose my patience now with the guy still dithering about, very apologetically, but still not getting my plates made. OK, an executive decision was made, scrub the first plate, remake them both with a black border, not really what I wanted but I’ve got a private plate on retention and the chances are that these plates are not going to be on there very long anyway. “OK, great” said the guy only to then report that they only had the front plates with a black border but he could do the rear one with a blue border. Last straw ! Scrub the whole thing, I’d been in the shop for nearly an hour now, I’ll go somewhere else. I was fuming and had to stand through the embarrassing procedure for the guy to sheepishly issue a refund and reverse my purchase through his till, one item at a time, that’s two number plates and 14 individual letters !

Time was getting on now and it was approaching rush hour, I just had enough time to get to another Halfords, much nearer home who made my plates, in the style I wanted, plain, with the letters I wanted, plain, in about 5 minutes flat! It was however just too late for me to get home, fit them and still go for the first drive on the first day. To have come this far and face so many challenges in such a short space of time it was time to relax, kick back and drink a well earned beer.

Wednesday 8 August 2012

The IVA itself

With the IVA the next day I wondered whether I’d sleep but it was quite a shock when the alarm went off, I’d been so tired I slept like a log and felt a little better for it. I still had a few things to sort out, my Dad was coming with me and came along in his car just in case ! I loaded my tools, various lengths of rubber hose, zipties and anything else I thought I might need, including my laptop, into my Dad’s boot and we set off. Because the rear pipes of the exhaust are the easy breathing type, I also had some baffles to fit just prior to the test to help deaden the sound and planned to pump up the tires when I got there to help with the steering self centreing part of the test.

The first “issue” of the day occurred when I stopped to fill up with petrol as the test required a full tank. On auto pilot I filled the tank like you would any other car only the petrol pump didn’t shut off immediately the tank was full and the additional fuel ran out over the rear deck of the car, part of which slopes forward. There’s a lesson for the future, I now had petrol running all over the back of the car some of which ran forward into the cockpit and soaked into the carpet. I paid the attendant, made a mental note to be more careful next time and set off once more, this time with an unleaded aroma filling the atmosphere.

We ran into a little traffic on the way, nothing too serious but enough to rob me of my preparation time before the test and as we arrived the examiner was there waiting for me and waved me straight in. A little panic set in as I hadn’t had time to pump up the tyres nor fit the baffles in the exhaust. I waved and mouthed a comment that I just had to speak to my Dad about something and frantically searched out the baffles in the box of bits in my Dad’s car before shoving them into the end of my exhaust. When I trial fitted these before, they were a really tight fit and I hoped that by wedging them in hard it would be enough to get me through. I restarted the engine and drove gingerly into the test centre.

The tester, Dave, introduced himself and explained what would happen through the test. He was a really nice guy which went a long way in putting my mind at ease. The first thing he would test would be the emissions as having driven the car there, the exhaust system was nice and hot which was a requirement before the emissions could be tested. Evidently the catalytic convertors only really work efficiently when they have reached their operating temperature. I was asked to start the engine and bring the revs up to 2,500 rpm. Perhaps I was a little nervous, understandably given the events of the days before, perhaps my inexperience with the car was to blame but the revs came up much quicker than I expected and the increased pressure in the exhaust “fired” one of the baffles straight out of the tail pipe landing some 10 feet away at the feet of another examiner. He was none too happy and returned the baffle suggesting they were dangerous and should both be removed before I went any further. Dave calmly asked me what they were for and whether they were needed. I made some excuses about the fitment and explained they should have been secured with jubilee clips but I’d forgotten to fit them. It was pretty obvious they were there to reduce the noise and Dave allowed me to “quickly” run back to my dad’s car in the car park and get the jubilee clips. 10 minutes in and I’d pissed off one examiner and put doubt into Dave’s mind as to what he might find next. A bad start was about to get worse, when I came back with the jubilee clips, one of them was made up of two smaller clips which had been joined together so had two adjusters 180 degrees apart. Dave advised me to fit the single, larger jubilee clip with the adjuster at the bottom as it had a contactable edge and the radius on it would fail the test, by placing the adjuster underneath the exhaust, at the bottom, it was outside of the test area and would be exempt. No matter what configuration I tried the second clip in, one of the adjusters was contactable which would mean it would fail the test. Great ! we had just got started and I had already failed ! Surprisingly, Dave suggested we test the exhaust for noise both with the baffles fitted and without and if it would pass without, I could remove the baffles completely and not have to worry about the contactable edge on the jubilee clip. Things were looking up !

We pressed on and on the second try, the car passed the emissions test. It wasn’t the emissions themselves which caused a problem but the lambda which seemed to be sensitive to engine speed. The second run was at a slightly higher rpm and it sailed straight through. Dave gave the car a good look over and asked various questions about the construction and parts fitted and seemed genuinely interested and rather pleasingly, impressed at the level of detail and general construction. In fact throughout the test I received several compliments from both Dave himself and several others from the test centre who stopped to take a look. One guy made a sweeping comment that you could tell it was “right” by the quality of the paint job, his face was a real picture when he found out it was polished gel coat!

We went outside for the self centering test which it passed easily, phew ! and onto the noise test. It was pretty obvious it would fail the 99db limit when it reached 98.4 db with the baffles fitted. When we removed them and retested it hit 105, oops, that jubilee clip was going to be a problem ! The visibility test came next which involved driving onto a predetermined mark and checking to see the extent of rearward visibility in the mirrors. Dave had some poles which would normally be placed into strategic positions but he said it was pretty obvious it would pass as the visibility was clearly in excess of that required. On the way back to the test area he checked the brakes to make sure the rear didn’t lock up before the front which was all ok and it was back inside and up onto the ramps for a good look round underneath. I did have a slight problem with one of the front flexible brake lines touching the wishbone. Dave pointed this out and suggested I might like to try and adjust it. It took three goes to get it right which bearing in mind this meant lifting the car up on the ramps for me to turn the steering side to side while Dave checked underneath, lowering to the ground so I could get out, lifting it up again for me to adjust it and then down again for me to get back in before it was raised up again for me to test, I really couldn’t have asked for more. BUT... that jubilee clip was still going to earn me a fail !

From the ramp, the car moved onto to be weighed and then onto the rollers for the brake test and then the speedometer test which involved driving the car up to 70mph whilst stationery and checking the speedo off against the calculated speed from the test machine. The speedo passed but there were some further calculations to be made to compare brake efficiency against the weight of the vehicle. Dave suggested we go for a cup of tea but I had other ideas ! My Dad and I jumped into his car and shot off around the industrial site looking for somewhere to get another jubilee clip. Just next door to the test centre was a commercial vehicle parts supplier, throwing myself on their mercy and describing myself as a male “damsel in distress” earnt me several jubilee clips of various sizes, one of which was bound to be suitable. Sure enough, on returning to the test centre, just as Dave had finished making his calculations, the replacement clip was fitted, declared a pass and we moved onto “general construction”. I was feeling pretty confident on this area and was pleased to see Dave move through it and declare he was happy. There were some further tests for lights, indicators, hazards lights etc and the dreaded windscreen wipers which had caused me so much heartache just 48 hours earlier. Everything worked, nothing melted or caught light and there was no sign of any smoke, phew ! Dave explained what he had tested, went through the checklist with me and returned to his office to complete the paperwork and finalise the calculations made on the brake efficiency.

I had about a 10 minute wait before he finally returned with my IAC certificate in hand and declared it a pass. A great sense of achievement mixed with relief washed over me. The test itself had actually be quite enjoyable, Dave was a great guy, very helpful, knowledgeable and it was plainly obvious he wanted me to pass. He certainly wasn’t the jobsworth man from the ministry type I had imagined.

Friday 3 August 2012

Lead up to IVA

Hope you’re sitting comfortably as I’m about to tell the whole tale of my trip to IVA. It started about 6 weeks ago when I finally plucked up the courage to send the forms off, I wasn’t quite ready but there’s nothing like a deadline to focus the mind. Unfortunately I failed at the first hurdle, misread the guidance notes and sent off a cheque for the wrong amount. I baulked a little at the £195 but when I found out it should be £450 I nearly fell off my chair. It took about a week for VOSA to tell me I’d sent the wrong amount and then about another week for them to process my application after I’d paid the extra and then another week for the IVA test centre to receive the paperwork. I then had a three week wait for an appointment.

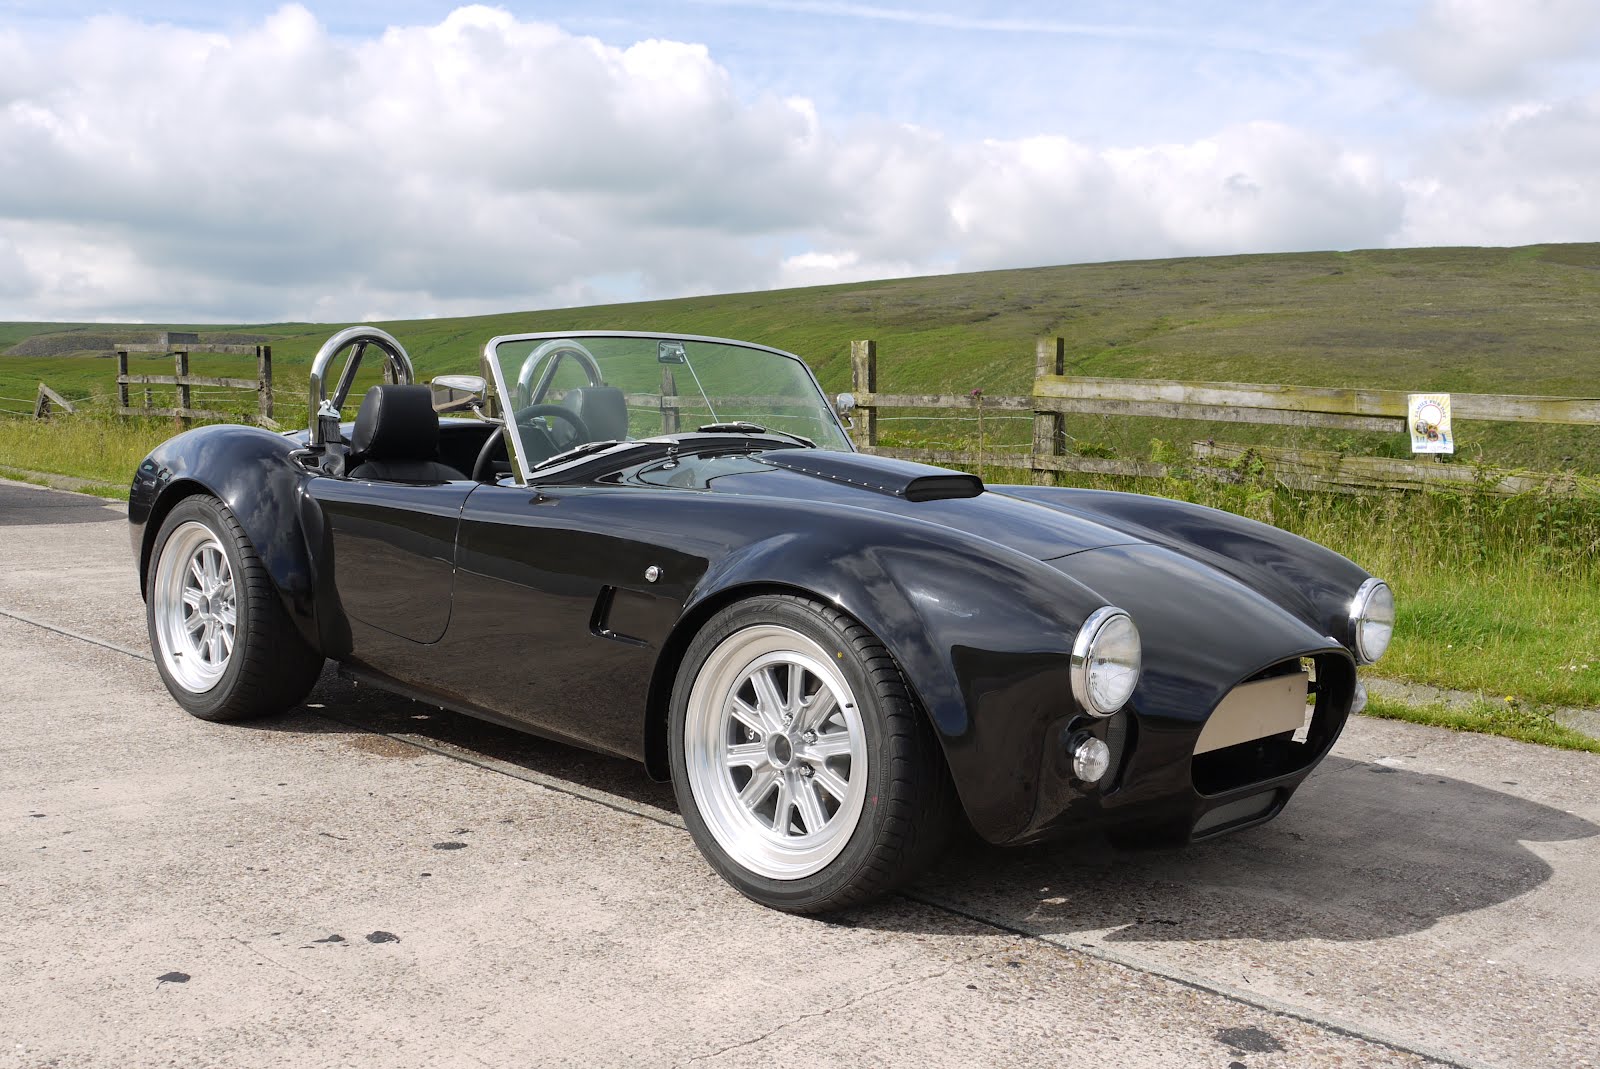
I’d always planned to go for a pre-IVA MOT in order to have a shake down before the big test, give me a chance to bed the brakes in and have someone with a little more knowledge than myself give the car a once over. Given the wait I now had I was even more keen as it was also a good excuse for a drive, this has been just under 5 years in the making and I was itching to get it on the road.

My wife came with me in the “support car” and the MOT went fine, it got a clean bill of health and the sun shone all the way there and all the way back. When you approach the village I live in, there is the short way to my house down a tight sharp turn or the long way, a bit further round the far end and back through the village itself. Given the circumstances, it had to be the long way despite flashing of lights and gesticulating hand gestures from my wife behind as she was supposed to be somewhere else and I’d already taken a little longer than I’d expected !

As I pulled into the far end of the village, the car began to behave a little strange, it was running very rough and it got gradually worse and worse until just before the hill up to where I live it died and I coasted to a standstill just outside the local chip shop. Expecting it to be lack of fuel, the “not very impressed” wife was despatched off to the local garage with a can as I sat a little embarrassed, outside the chip shop as people slowed down to look and stare. One guy was so intent he slammed on the brakes and backed up without even looking behind. This resulted in the angry sound of a horn and waving fist of the guy behind as he had to violently swerve to avoid an accident.

The wife arrived back with the fuel which was duly poured into the filler for a frantic last blast up the hill to home so she could get off to her other appointment BUT... the car wouldn’t even turn over and I was greeted by the click click click of the starter solenoid. By now a crowd had started to gather including an older gentleman who asked if I would mind if he took some photographs as “you don’t often see old cars like this still on the road”. I just smiled and nodded my head. A quick poll of the onlookers determined no one had jump leads or a tow rope so I jumped in the “support vehicle” and headed for a neighbours who I was sure would have a tow rope, he did and I returned to unceremoniously tie the rope onto the cobra and tow it home with the wife behind the wheel. At least she got to drive it eh ?.

Further investigation showed the cause to be a dodgy alternator and with now only two weeks before the test I had to get a replacement. Andy at GD helped me with this and within a couple of days everything was back to how it should be. The next week was spent tidying a few loose ends and getting everything ready for the IVA.

Two days before the IVA test, one of the last jobs was to wash and polish the car and put the labels on the dash to identify the various controls. Whilst doing this I ran through a few last minute checks when everything started to take a turn for the worse.

The first thing I noticed was a strange clicking noise when turning the key in the ignition, sometimes it did it and sometimes not. Whilst trying to narrow it down, checking relays etc I also tried some of the controls such a windscreen wipers, lights, indicators etc. Whilst I was around the front of the car checking the headlights, smoke started pouring out from the dash, fearing the worst my first reaction was to run into the garage to find a 17mm spanner to undo the battery leads form the studs under the bonnet. With the reduced access in this area coupled with the fear of shorting the live and neutral terminals with the spanner, it seemed like an age before it was finally disconnected, all the while with smoke pouring out from the dash, my kids staring at Daddy wondering what was happening and my wife panicking in my peripheral vision.

I really thought I was going to lose it and it would go up in flames. It didn’t and what followed next was quite an emotional period which needs no further explanation !

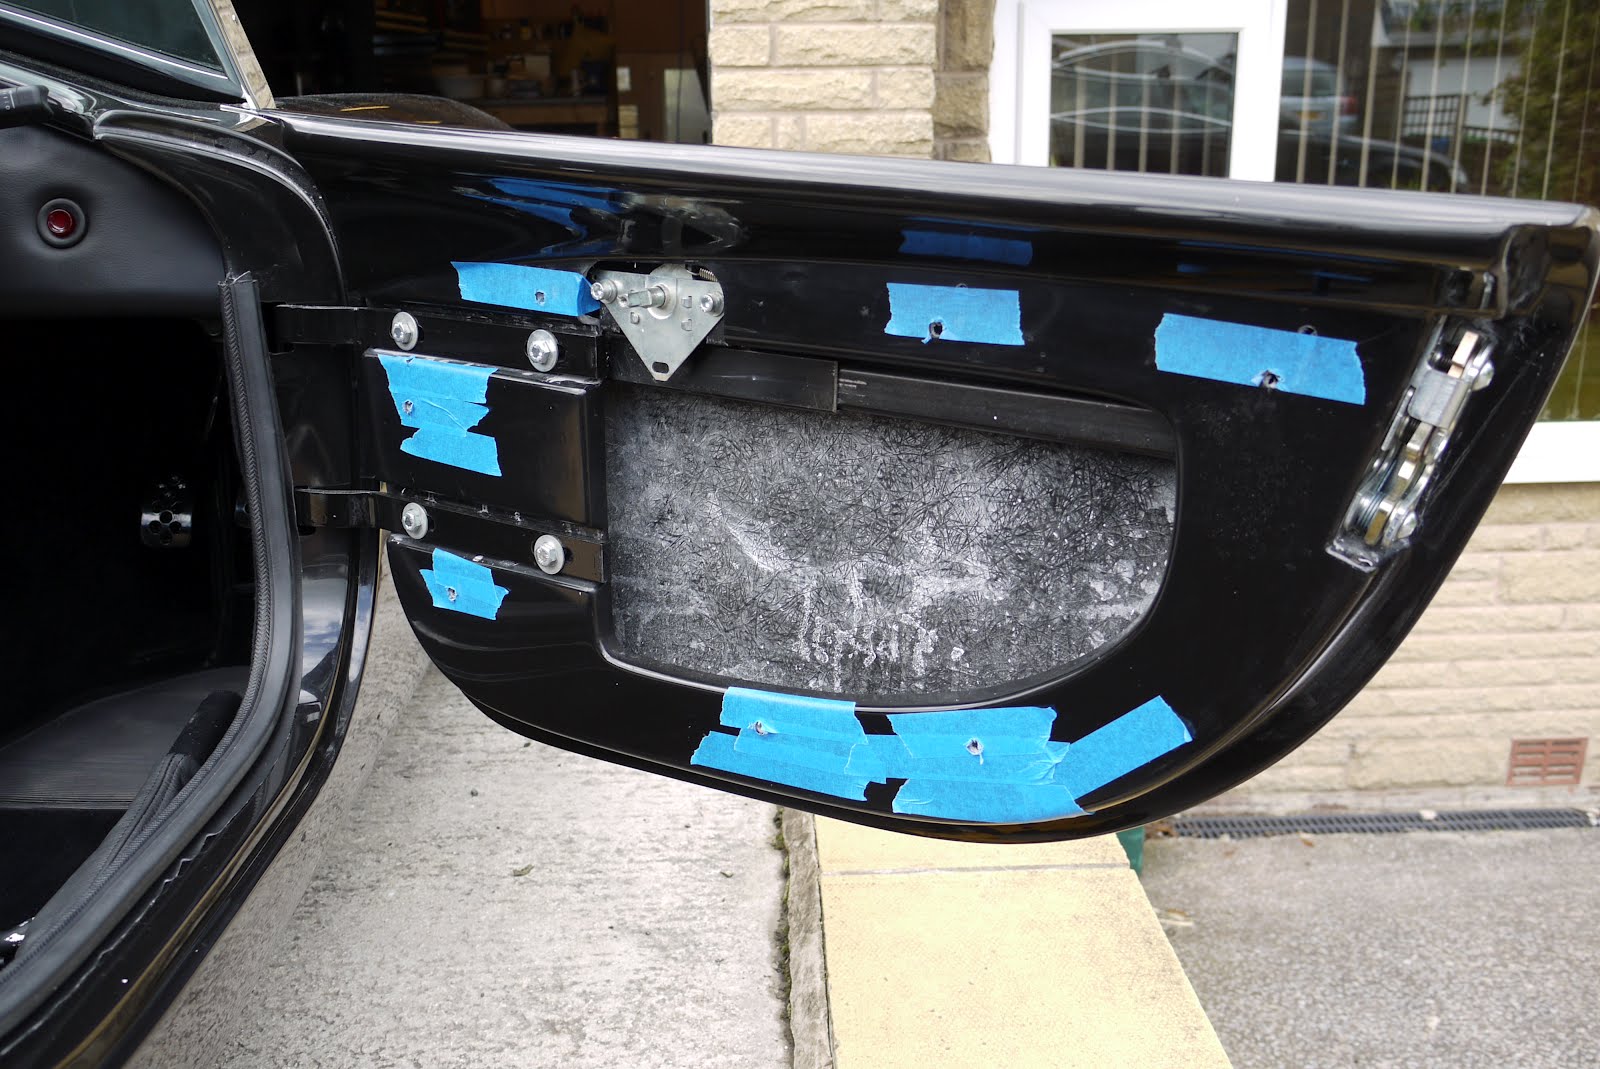
Once I had recomposed myself and had the presence to return and examine the damage it was apparent some kind of short had occurred behind the dash and several wires had burnt their plastic covering off over their whole length and melted and fused other circuits together, burning straight through the leather trim and piping which also ran in this area. It was a real mess and with the burnt wiring, plastic zipties and leather piping it smelt terrible as well. In order to gain proper access I had to remove the steering column, dash under trays and finally the dash itself all the while wondering what I would discover. Using the circuit diagram it appeared the most likely fault lay with the wiper motor and sure enough, testing it with a multimeter showed a direct short to earth. Ordinarily you would have expected a fuse to blow but for some reason it didn’t and by the time the various circuits had fused together it was too late anyway.

With two days to go until the IVA test I couldn’t re-arrange without forfeiting the whole fee. With the prospect of losing £450 I made the decision, come hell or high water I would attempt to fix the problem and turn up for the test even if it had to be towed there. At least if it couldn’t be tested properly I only faced the prospect of a retest at £90 and I might be in for a retest anyway as I was told only very few builds pass first time.

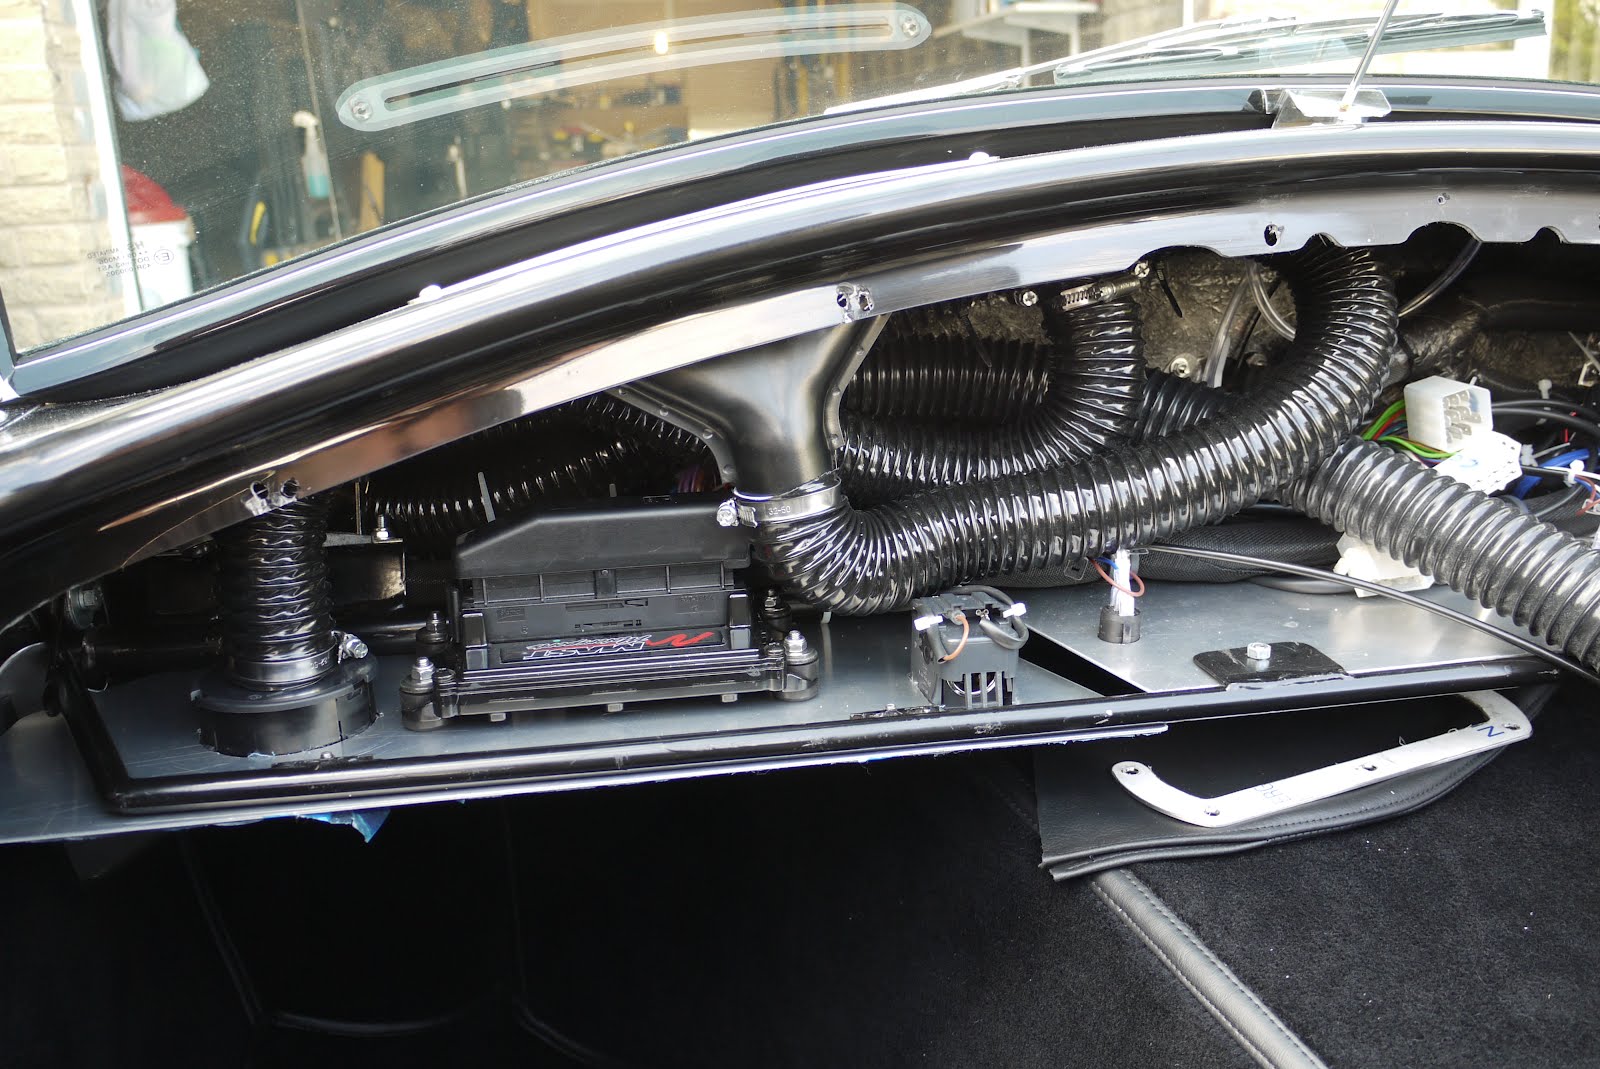
Again, a call to Andy at GD got me a replacement loom and wiper motor and with now only one clear day before the test I had to pull a late one until 1am in the morning to get everything back together before a very tentative recheck of all the electrical circuits, 17mm spanner in hand a fire extinguisher standing by. I’m very pleased to say it all worked fine, didn’t melt itself into a mass of fused plastic and copper wiring and didn’t burst into flames.

The next day was work as usual and the evening spent carrying out all the smaller jobs I’d intended to do two days before, labelling the dash, checking wheel nuts were tight as well as packing most of my tools, rubber edging and zip ties etc in order to be as well prepared as possible for anything the IVA test might throw up. I’d heard that generally, the examiners want you to pass and if there was an opportunity to fix anything on the day, there might be a certain amount of leeway.

I had an early start the next morning and had to be away from home around 7 for the drive to the test centre to be there for 8am. One last job before bed was to print off a selection of photographs to take with me, partly to provide some kind of proof that I’d actually built it but also to show the examiner details of any areas which now might be covered such as wiring which was now hidden by carpet or brake lines hidden behind footwell compartments etc. First problem, the printer had run out of paper, finding an old report from work, noting sensitive, I turned it over to print on the back. Time and time again I tried but on each occasion, the paper jammed and I had to pull the crumpled paper out and start again. On the 4th or maybe 5th time I spotted a strange red foreign object inside the printer which turned out to be part of one of my kids toys and was the reason the paper kept jamming. Carefully pulling it out and for the second night staying up past midnight I was now on the home straight, that was until the printer ink ran out! In despair, I copied the photos onto a CD ROM and added a laptop computer to my tool kit to display them on. Finally, I got myself off to bed, completely exhausted, physically, mentally and emotionally. I had done all that was possible, if I failed now it wouldn’t be through lack of effort.

Thursday 2 August 2012

IVA

Today was the day and.... it passed !

I've got a few tales to tell and will do a full update later, I'm just off to the DVLA to get it registered.

Friday 20 July 2012

IVA - date confirmed

Got my date through for IVA, it's Thursday 2nd August, 8am. It took a little longer to come through than I'd hoped but given the problem I had with the alternator, I'm glad of the extra time. I should get the new alternator in this weekend and then it's just a matter of going right through the car once more, checking everything's tight, any sharp edges taken car of and everything's adjusted as it should be.
Roll on the 2nd August, let's hope it's not raining !

Thursday 12 July 2012

MOT

Well the 11th came and went with no date set for the IVA.
Being a little impatient but also in line with my original plans I took the car for a pre IVA MOT test.
The test itself was quite uneventful with the car getting a clean bill of health but the drive there and back was fantastic. I did have a little breakdown just as I got home caused by a flat battery which on further investigation proved to be a dodgy alternator but it wasn't enough to remove the permanent grin I've been wearing ever since. I must have picked the best day of the summer so far and had a traffic free 20 mile round trip in glorious sunshine.

Stopping on the way for a few basic checks proved to be a good photo opportunity to record the first time the car has been out on the road.


Sunday 8 July 2012

It's ALIVE !!!

Last post for today, no pictures, no video, just a great big smile.

One thing I forgot to mention in my previous post was that when I put the car away in the garage today, I DROVE it in !

It's been 5 years in the making and whilst the maiden voyage was only about 5 metres, I have driven my car !

With hindsight, it would have been a better idea for the first drive to have been "out" of the garage rather then "into" the garage but nethertheless, it moved under it's own power and everything was great !

Wiper arms

Finally, the rain couldn't hold off any longer and I had to put the car away in the garage, ironically, this reminded me I needed to fit the windscreen wipers. These were relatively straight forward but the arms had to be tweaked a little in the vice to get the bend right so the blades sat square with the bottom of the screen. The arms were adjustable for length and once set so they reached the top of the screen as they swept, a small locking tab is twisted to hold them at that length.

Indoor picture I'm afraid

Hydraulic hose bracket.

I actually made this a few weeks back but only just reached the position where I could fit it.

I started out with a length of box section.


From which I cut a section designed to cup the hydraulic hoses which go from the resevoirs to the master cylinders.


I used an off cut to make a leg and drilled some holes for mounting and allow me to "puddle" weld the two together.


Welds finished and ground smooth


I painted it black with some POR-15 and bolted it to the steering column support using the same U-bolt that holds the column itself. To finish, a couple of zip ties holds the hydraulic hoses in their place. Quite proud of this !

Mirrors

The side mirrors screw into some holes I drilled and tapped into the windscreen support frame. These come fitted with mounts to fit onto doors which need replacing with the arms supplied by GD. It's simply a case of removing the plastic clip which holds the glass in, undoing the screw which holds the mirror onto the mount, swapping for the GD one and putting it all back together.


I also fitted the rear view mirror which clamps onto the windscreen centre stay. The stay is designed to hold the top of the windscreen frame down when a soft top is fitted which at speed, pulls up on the top of the frame. Unfortunately, whilst it will no doubt do it's job, it's not tensioned at rest and allows the mirror to wobble a bit. I'll have to sort something for the IVA test as I understand a "wobbly" mirror is a fail.


Sorry, just realised how pointless this last picture was, it was meant to show all the mirrors mounted but if you look closely, you can just make out the rear view mirror fitted at the top of the screen. I'll sort out a better picture next time.

Number Plate

In order to mount a number plate to the number plate bar I made a MDF blank which fits onto the bar using 19mm p-clips. They were a little loose so I used a bit of insulating tape around the bar to pad it out a little. Whilst I haven't got a number plate yet, this area is part of the IVA test and if nothing was fitted in this area it would be fail.

This gave me a chance to get some of my power tools out that haven't been used in while and I used a router to put a nice radius on the edge of the MDF.


Interior finished

Other than replacing my "just for now" steering wheel, the interior is now finished. I've fitted the dash and steering column for the last time having tested all the electrics and I'm very pleased to say everything works as it should, including the additional circuits I added myself.


  • Neutral Safety Switch - Engine only starts if the clutch is depressed, check !

  • Reverse Lockout Solenoid - Reverse can only be engaged with clutch depressed and brakes on, check !

  • Hidden drop down 12v socket under dash - powers SatNav, charges phone etc, check !

  • and last but no means least, heated seats - nice warm bottom, check !


Door Cards

Next up was the door cards. These come premade with the fixing clips supplied. I made a bit of a mess with the first one largely because I assumed the orientation of the clips should be vertical but they were too close to the edge and fouled the rear of the leather where it folds over onto the rear of the card. I changed tack and fitted the clips into the card horizontally which gave no clearance problems and made the job a lot easier. The clips were quite a tight fit into the card and the cards are quite light so I'm not worried about the card dropping once fitted. The method involved punching a hole through the leather to line up with the door handle and then by placing the top row of clips into the card and marking the end with a marker pen, you use the door handle as a point of reference and push the card onto the door transferring the marks from the end of the clips onto some masking tape stuck to the inside of the door. Drill these marks out to 7mm, repeat the same technique for the others and the door card clips into place. Before fitting I took a picture of the rear of the card, noting the orientation of the clips which will make things easier should I ever have to remove it.


Same technique for the other side which was a lot easier and a lot faster having learnt all my lessons on the first one

Gear shift gaiter

A busy weekend, it managed to stay dry for most of and I got quite a lot done in which was supposed to be the last weekend before my IVA test but I've still not had my date through. Oh well, press on regardless.

The first thing I did was to fit the gaiter which covers the gear shift. The leather is secured by a stainless steel ring and needs to be pulled out around it's edges to fit underneath. Using a needle, I I threaded some cotton through the edge of the leather so I could pull it outwards from underneath the plate


By pulling on the cotton threads and then tightening down the escutcheon plate with some self tapping screws, I managed to pull the leather into place and trap it at the same time. Then it was just a case of removing the protective film, eh voila !

Sunday 1 July 2012

Seats in

Kinda lost my way over the past couple of days, been running around doing little bits here and there, finishing off the odd job where I'd used a standard nut but meant to use a nyloc, tidying some of the cable runs, trimming the ends off cable ties ect. and thinking about the IVA.

In terms of milestones, I've fitted the harness eye bolts after painting the load spreading plates black which go under the floor. I also fitted the eyebolts into the roll bars. As the roll bar contains a captive nut in the form of a threaded sleeve, in order for the eyebolt to tighten into the correct position you have to add or remove washers so it's vertical when fully tightened.


I fitted the handbrake gaitor, the one supplied is made from thick stainless steel and I wasn't sure how it fitted, it appeared that it had to be bent to follow the contour of the floor in this area and rather than risk making a mess of it, I made a copy in aluminium as a trial. The ally one fitted perfectly and as you can't even see it when the seat is fitted I'll leave in place for now. If the seats ever have to come out again, I'll fit the stainless one.


Once the harnesses were in I couldn't resist trial fitting a seat.


And once you've started, well, it would be rude not too !


Only the door cards and gearstick to go and the interior will be finished.

Thursday 28 June 2012

Heater hoses

Started on the heater hoses, this all seems like quite a tight fit, one reason is that the aluminium plates which fit under the dash have to go on last so all of the wiring and heater hoses have to be long enough to attach to the plates before they are pushed up into position.


Each hose, one for each side of the car, splits into two runs, one goes to the footwell and the other to the screen demist vent.


The splitter piece was made from a piece of plastic waste pipe, cut, stuck together and painted black.


Thursday 21 June 2012

IVA

The latest part to be completed is the application form for my IVA test. I've requested 11th July, just got to wait and see what date they come back with. I've still got a little more work to do but everything is falling into place and I've still got a few clear weekends to get everything sorted.

Monday 18 June 2012

Column shroud

I finished fitting the column shroud this evening. After cutting the holes in the aluminium earlier I stuck the leather on and cut out the clearance holes for the ignition barrel and indicator/wiper stalks.


There's a trick to making a neat job around the ignition barrel which involves removing it from the column by turning the key to position 1 and inserting a thin tool into a hole at the front.


This causes the barrel to pop out


You can then place the shroud over the column and cut the leather slightly smaller than the outside edge of the hole so that when you place the barrel back in it traps the leather.


Before refitting the barrel you have to push down on a small u shape part within the barrel until it clicks, then when you push the barrel back in it should click twice before it's back in position.


I followed these directions from other blog sites and found it all pretty straight forward. Those directions came with a warning which I feel is only fair to pass on... once the mechanism is removed from the barrel DO NOT TURN THE KEY AND DO NOT ROTATE THE STEERING COLUMN. Don't know why but I thought I'd heed the warning and not have to find out.

I also fitted the lever which controls the tilt mechanism to adjust for comfort. I used a punch to make a hole in the leather and then a small grommet to tidy it up. I've got some more stainless stalks which replace the plastic ones for the indicators and wiper but that's a job for another day.


All finished,

Sunday 17 June 2012

Electrics

Well I finally plucked up courage and connected the battery today. All circuits worked OK except for two which kept blowing fuses. A bit of detective work sorted the first, the sidelight bulb was damaged and where the terminals pushed into the holder it was creating a short. The second I've not solved yet. On accessory power i.e. first position on the ignition, if I put everything on i.e heater, wipers, washer, sidelights and fog light and then flash the headlights, the bulb blows. It isn't a problem on the second position just the first. It suggests the fuse for the accessory circuit isn't rated high enough but I want to be sure before I mess with it. Either that or refrain from sitting there with my lights on, in the fog, with the engine off, heater on, washing the windscreen with the wipers going and flashing my headlights at passers by.

I'll try and post some pictures later in the week but the other achievements were fitting the side repeaters, fitting the windscreen washer jet and the windscreen wipers and finally fitting the windscreen centre stay which was a bit fiddly and necessitated cutting down an Allen key to fit.

I also fitted the front floor carpets and started painting the underfloor strengthening plates for the seatbelt harnesses.

One setback I had today concerns the wiper motor. When I originally fitted it I checked the park position and decided it was correct, result ! The more I thought about it and looked at other cars made me decide it was wrong after all so I had to take it out again, take it all apart and move the small plastic "ramp" inside which dictates which side it parks on. This wasn't too difficult but I did have a little trouble getting it all back together. Anyway, turns out I was right the first time, if you look at a cobra you'll notice the wipers park on the opposite side to a normal car, well that's true for my car anyway. So I had to take it out again, only this time, the dash under trays, wiring looms and carpet have all been added which made it a little more tricky. In addition, it turned out I had slightly damaged the end of the wiper motor shaft when I refitted the circlip and I couldn't now get the shaft out of the casing. I ended up having to drift it out with a punch which also pulled the press fit bearings out ! So a simple job which was right the first time took me all afternoon to put right... again, including getting grease all over my lovely new carpet :-(

Tuesday 5 June 2012

Floor carpets pt 1.

I stole and hour or so in the garage today to finish glueing the piece of carpet to the rear bulkhead and to fit the rear floor carpets. These aren't glued in but held in place by nature of the harness eye bolts and seats runners bolting through them. I'd previously drilled the holes for the harness and seats and by placing the carpet in position and then carefully pulling it back and marking the hole edges with a piece of chalk I could lay the carpet back down and transfer the marks onto the rear. Removing the carpet from the car, I used a punch to cut out the holes. Here you can see it laid back in with bolts pushed through the holes to make sure it all lines up. This is the drivers side and you can see I still need to cut around the handbrake mount which I'll try and do tomorrow. The wire and connector you can see at the rear is for the heated seats.